
 Facebook
 X
X
 Pinterest
 Copy Link
Selling your home: A step-by-step approach


Whether you’re starting a family, moving for your job, getting ready to retire or embarking on a new chapter in your life, when your home no longer suits your current situation, it’s time to think about selling it. Although this can be a bit complicated, with the help of your agent, you can minimize the hassles, get the best possible price, and shorten the distance between “For Sale” and “Sold”.
Price it right
If you want to get the best possible price for your home and minimize the time it stays on market, you need to price it correctly from the beginning. Your agent can give you a clear picture of your particular market and can provide you with a comparative market analysis (CMA). A CMA contains detailed information on comparable homes in your area, including square footage, date built, number of bedrooms, lot size and more. It lists pending sales and houses sold in your area in the past six months, along with their actual sale prices.
By comparing your home to similar homes in your neighborhood and reviewing their list prices and actual selling prices, your agent can help you arrive at a fact-based assessment of your home’s market price.
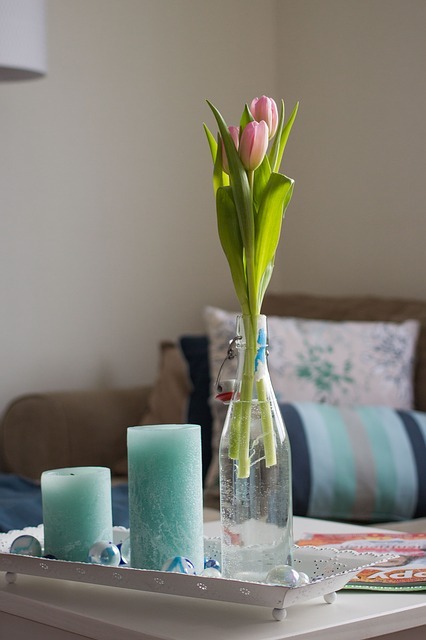
Prepping your house for sale
You want to make a positive first impression when you list your home for sale. Here are some tips on how to enhance your home’s best features:
Work on your curb appeal
Get rid of moss on your roof. Power wash your front walk, porch, deck and patio. Mow the lawn, trim the hedges, weed the flowerbeds and add spots of color with container plants. Clean all the windows inside and out and repair them if they don’t open and close easily.
Refresh, repair and repaint
This goes for interiors and exteriors. If you see peeling paint, add a fresh coat. If your living room is bright lime green, consider painting it a more neutral shade. Make necessary repairs. You don’t want to turn off a buyer with a dripping faucet, a broken doorbell, a clogged downspout or a cracked windowpane.
Deep-clean, from floor to ceiling
Clean rugs, drapes and blinds and steam-clean carpeting. Get rid of any stains or odors. Make sure kitchen appliances, cupboards and counters are spotless and that bathrooms shine.
Declutter and depersonalize
Clean, light-filled, expansive rooms sell houses. So be sure to downsize clutter everywhere in your home, including cupboards, closets and counters. You might also consider storing some furniture or personal items to make rooms look more spacious. Take advantage of views and natural light by keeping drapes and blinds open.
Make an impact on the market
If you want to sell your home, you need to go where the buyers are, and today they’re on the Internet. According to the National Association of REALTORS®, in 2012 90 percent of homebuyers used the Internet as an information source, and for 41 percent of homebuyers it was the first step in the home-buying process.
By working with your agent, you can list your home on Windermere.com and other relevant websites. He or she will put together a listing with attractive photos, an appealing description and all the information a potential buyer needs. Your agent will also market your house, which may include advertising, direct mail and open houses.
Show your house
After you’ve taken care of all the repairs and cleaning tasks outlined above, your home is ready for its close-up: an open house. It’s actually best for you and your family to leave when potential buyers are present so they can ask your agent questions. But before you go, you might want to:
· Take your pets with you
· Open the shades and turn on the lights
· Light a fire in the gas fireplace
· Bake cookies
· Keep money, valuables and prescription drugs out of sight
Be flexible in negotiating
If you get offers below your asking price, there are a number of strategies you can try in your counteroffer. You could ask for full price and throw in major appliances that were not originally included in the asking price, offer to pay some of the buyer’s fees, or pay for the inspection. You could also counter with a lower price and not include the appliances. If you receive multiple offers, you can simply make a full-price counter.
Your agent can suggest other strategies as well and help you negotiate the final price.
If your house doesn’t sell or you’ve received only lowball offers, ask your agent to find out what these prospective buyers are saying about your house. It might reveal something you can consider changing to make your house more appealing in the future.
Breeze through your inspection
When a buyer makes an offer on your home, it’s usually contingent on a professional inspection. A standard inspection includes heating and cooling, interior plumbing and electrical systems; the roof, attic and visible insulation; walls, ceilings, floors, windows and doors; and the foundation, basement and visible structure. The inspector will be looking for cracks in cement walls, water stains and wood rot.
You can always opt for having an inspection done prior to putting your house on the market, so you can address any potential problems in advance. Your agent can give you several recommendations for qualified inspectors in your area.
Close with confidence
Whether this is your first time or your tenth, your agent can help guide you though the complex process of selling a home. Moreover, he or she can answer any questions you may have about legal documents, settlement costs and the status of your sale.
Your agent’s expertise, resources and extensive network also work for you when you’re buying your next house. Even if you’re moving out of the area, your agent can refer you to a professional agent in your new community.
For more information on Windermere Evergreen and our agents, please contact us here.
Take it outside!

 Dust off your grill and get ready, it is the kick-off to barbecue season! Hopefully your summer is on its way to a good start and the weather is cooperating. The 4th of July always feels like the official start to the summer for me (perhaps because Seattle doesn’t usually get too sunny and warm until after the holiday). Now that the sun is shining and the air is warm it is time to spend more time outside.
Extending your living space to the outdoors is nice for relaxing and entertaining. Here are some quick ideas to make your backyard patio more comfortable all summer long.
Grounds
Take a look at your surroundings and make some little changes that will make your outdoor time more enjoyable. Some easy updates for your backyard can be functional, like setting your sprinkler on a timer, so technology can water your yard and you can spend more time relaxing. Or find aesthetically pleasing replacements for necessary items like your hose storage. Other improvement can help transform your space into a sanctuary, like planting flowers to attract hummingbirds and butterflies.
Furniture
The best outdoor furniture looks nice, feels comfortable, withstands the elements and is easy to store once the weather turns. You should consider how you plan to use your space: for lounging and reading a book, playing with the kids, entertaining, or all of the above. Treat outdoor spaces as an extension of your living room or dining room. Pick items that reflect your taste and serve your needs. If you grill a lot, extend your kitchen prep outside with tools and a surface ready at a moment’s notice. Or find a neat bar cart to have drinks accessible for your parties.
Lighting
Make sure you can enjoy your space after the sun goes down with the right lighting solutions. Candles are nice, but they can be a hazard if someone knocks them over or you forget them after you go indoors. Consider the mood you want to set and what you need to adequately light pathways and stairs. There are many options ranging from homemade to high-end and solarto electric.
Entertaining
Keep your entertaining supplies ready for impromptu gatherings with outdoor furniture that doubles as storage space. That way you don’t have to go searching for plastic table wear every time. Same goes with outdoor toys and games; use a closed plastic bin to store croquette sets, inflatable pool mats, and other fun gear. Another fun idea is setting up your own outdoor theater for late night showings and double features.
These are just a few of the ideas I’ve considered for upgrading an outdoor living space. How do you make the most of your outdoor space during the summer?
For more information on Windermere Evergreen, please contact us here.
Windermere Evergreen’s Grand Opening


Windermere Evergreen held it’s Grand Opening on Friday, February 16th. It was a great event and we were joined by many close friends, co-workers and family. Evergreen Chamber of Commerce was at the event, for a ribbon cutting ceremony. Inspired fitness our new neighbors in the building, joined us as well in celebrating their Grand Opening at the same time. It was a successful event and we are very excited to be “officially” open for all of your Real Estate needs! Thank you everyone for coming out to celebrate with us!
How long should they last?

 Nothing in life lasts forever – and the same can be said for your home. From the roof to the furnace, every component of your home has a life span, so it’s a good idea to know approximately how many years of service you can expect from them. This information can help when buying or selling your home, budgeting for improvements, and deciding between repairing or replacing when problems arise.
According to a National Association of Home Builders (NAHB)study, the average life expectancy of some home components has decreased over the past few decades. (This might explain why you’re on your third washing machine while Grandma still has the same indestructible model you remember from childhood.) But the good news is the life span of many other items has actually increased in recent years.
Here’s a look at the average life spans of some common home components (courtesy of NAHB).
Appliances. Of all home components, appliances have the widest variation in life spans. These are averages for all brands and models, and may represent the point which replacing is more cost-effective than repairing. Among major appliances, gas ranges have the longest life expectancy, at about 15 years. Electric ranges, standard-size refrigerators, and clothes dryers last about 13 years, while garbage disposals grind away for about 10 years. Dishwashers, microwave ovens, and mini-refrigerators can all be expected to last about nine years. For furnaces, expect a life span of about 15 years for electric, 18 for gas, and 20 for oil-burning models. Central air-conditioning systems generally beat the heat for 10 to 15 years.
Kitchen & Bath. Countertops of wood, tile, and natural stone will last a lifetime, while cultured marble will last about 20 years. The life span of laminate countertops depends greatly on use and can be 20 years or longer. Kitchen faucets generally last about 15 years. An enamel-coated steel sink will last five to 10 years; stainless will last at least 30 years; and slate, granite, soapstone, and copper should endure 100 years or longer. Toilets, on average, can serve at least 50 years (parts such as the flush assembly and seat will likely need replacing), and bathroom faucets tend to last about 20 years.
Flooring. Natural flooring materials provide longevity as well as beauty: Wood, marble, slate, and granite should all last 100 years or longer, and tile, 74 to 100 years. Laminate products will survive 15 to 25 years, linoleum about 25 years, and vinyl should endure for about 50 years. Carpet will last eight to 10 years on average, depending on use and maintenance.
Siding, Roofing, Windows. Brick siding normally lasts 100 years or longer, aluminum siding about 80 years, and stucco about 25 years. The life span of wood siding varies dramatically – anywhere from 10 to 100 years – depending on the climate and level of maintenance. For roofs, slate or tile will last about 50 years, wood shingles can endure 25 to 30 years, metal will last about 25 years, and asphalts got you covered for about 20 years. Unclad wood windows will last 30 years or longer, aluminum will last 15 to 20 years, and vinyl windows should keep their seals for 15 to 20 years.
Of course, none of these averages matter if you have a roof that was improperly installed or a dishwasher that was a lemon right off the assembly line. In these cases, early replacement may be the best choice. Conversely, many household components will last longer than you need them to, as we often replace fully functional items for cosmetic reasons, out of a desire for more modern features, or as a part of a quest to be more energy efficient.
Are extended warranties warranted?
Extended warranties, also known as service contracts or service agreements, are sold for all types of household items, from appliances to electronics. They cover service calls and repairs for a specified time beyond the manufacturer’s standard warranty. Essentially, warranty providers (manufacturers, retailers, and outside companies) are betting that a product will be problem-free in the first years of operation, while the consumer who purchases a warranty is betting against reliability.
Warranty providers make a lot of money on extended warranties, and Consumers Union, which publishesConsumer Reports, advises against purchasing them. You will have to consider whether the cost is worth it to you; for some, it brings a much needed peace of mind when making such a large purchase. Also, consider if it the cost outweighs the value of the item; in some cases it may be less expensive to just replace a broken appliance than pay for insurance or a warranty.
For more information on Windermere Evergreen, please contact us here.
How to Decorate a Rental

Abiding by rental rules is important, but so is style and making a house feel more like a home. Thus, we’ve put together a little list for you to help personalize your home, while still insuring you get your security deposit back by the end of it.
Storage – Let’s be honest, rentals often lack sufficient storage place, and since custom cabinetry isn’t usually an option for renters, investing in some added storage is key. Add some simple shelves, bookshelves, baskets, or under the bed storage.
Blinds – Vertical blinds may be the ultimate decorating sin. No one likes feeling as if they’re living in a motel room. We suggest you either take them down or hide them under curtains. Just don’t throw them out or you may not get your security deposit back!
Accessorize – Pillows, throws, candles, books, light fixtures… the only way to get a truly genuine space. This is by far the easiest and a MUST.
Wall Art – Those pesky holes might keep you from hanging art or photos on your walls, but when it comes down to it, they’ll only take a few minutes to patch up when it comes time to move out. This doesn’t mean you have to hang an entire art gallery, but hanging one statement piece and placing the rest of the photos on a mantel or shelf should do the trick.
Rugs – Last but not least, rugs: the peanut butter to your rental jelly. If there are scratched hardwood floors or stained carpets, you can cover those up easily with a throw rug. Not only that, a rug is a great investment piece that will add your personal flavor to any space. And they absorb noise and make a room feel comfy.
For more information on Windermere Evergreen, please contact us here.
Indoor Air Quality Basics

 Most of us tend to think of air pollution as something that occurs outdoors where car exhaust and factory fumes proliferate, but there’s such a thing as indoor air pollution, too. Since the 1950s, the number of synthetic chemicals used in products for the home has increased drastically, while at the same time, homes have become much tighter and better insulated. As a result, the EPA estimates that indoor pollutants today are anywhere from five to 70 times higher than pollutants in outside air.
Luckily, there are many ways to reduce indoor air pollution. We all know that buying organic and natural home materials and cleaning supplies can improve the air quality in our homes, but there are several other measures you can take as well.
How pollutants get into our homes
Potentially toxic ingredients are found in many materials throughout the home, and they leach out into the air as Volatile Organic Compounds, or VOCs. If you open a can of paint, you can probably smell those VOCs. The “new car smell” is another example of this. The smell seems to dissipate after a while, but VOCs can actually “off-gas” for a long time, even after a noticeable smell is gone.
We all know to use paint and glue in a well-ventilated room, but there are many other materials that don’t come with that warning. For instance, there are chemicals, such as formaldehyde, in the resin used to make most cabinets and plywood particle board. It’s also in wall paneling and closet shelves, and in certain wood finishes used on cabinets and furniture. The problems aren’t just with wood, either. Fabrics—everything from draperies to upholstery, bedding, and carpets—are a potent source of VOCs.
The good news about VOCs is that they do dissipate with time. For that reason, the highest levels of VOCs are usually found in new homes or remodels. If you are concerned about VOCs, there are several products you can buy that are either low- or no-VOC. You can also have your home professionally tested.
How to reduce VOCs in your home
Make smart choices in building materials.
- For floors, use tile or solid wood—hardwood, bamboo, or cork – instead of composites.
- Instead of using pressed particle board or indoor plywood, choose solid wood or outdoor-quality plywood that uses a less toxic form of formaldehyde.
- Choose low-VOC or VOC-free paints and finishes.
Purify the air that’s there.
- Make sure your rooms have adequate ventilation, and air out newly renovated or refurnished areas for at least a week, if possible.
- Clean ductwork and furnace filters regularly.
- Install air cleaners if needed.
- Use only environmentally responsible cleaning chemicals.
- Plants can help clean the air: good nonpoisonous options include bamboo palm, lady palm, parlor palm, and moth orchids.
- Air out freshly dry-cleaned clothes or choose a “green” cleaner.
Fight the carpet demons.
- Choose “Green Label” carpeting or a natural fiber such as wool or sisal.
- Use nails instead of glue to secure carpet.
- Install carpet LAST after completing painting, wall coverings and other high-VOC processes.
- Air out newly carpeted areas before using.
- Use a HEPA vacuum or a central vac system that vents outdoors.
Prevent Mold.
- Clean up water leaks fast.
- Use dehumidifiers, if necessary, to keep humidity below 60 percent.
- Don’t carpet rooms that stay damp.
- Insulate pipes, crawl spaces, and windows to eliminate condensation.
- Kill mold before it gets a grip with one-half cup of bleach per gallon of water.
We hope this information is helpful. If you would like to learn more about VOCs and indoor air quality, please visit: http://www.epa.gov/iaq/
For more information on Windermere Evergreen please contact us here.
Conifer Proposed Town Home Project

Featuring 22.82 Acres
Centrally located in Conifer, Colorado on the main 285 corridor which is the
primary route to and from C-470, Denver and local communities. This
unique 22.82 acre project has been approved for 75 Town Homes and has
all approvals and infrastructure requirements in place including water and
sewer. Located just behind the busy Flagship Safeway Shopping Center
with all of its amenities. There is unparalleled NW Mountain views and this
property is located across 285 from top rated Colorado Elementary and
High-schools. Don’t miss out on this highly sought after 22.82 Acre
opportunity!
For more information please visit, the listing website.
You may also call Holly Roberts at (410)698-2617


Preparing to buy – Home resolutions

 If you are ready to make the move towards purchasing your first home or upgrading to a new home, there are some considerations you should keep in mind to make the process easier. The housing inventory is up in most markets with the start of the new year, giving you more options. Whether you are just starting to save for your future home or you are ready to start searching, here are some tips you may find useful:
Assess your financial situation: If you have just started thinking about purchasing a home, now is a good time to do some research to see how close you are to accomplishing this dream. Check your credit score, assess your debt, and make a plan for paying down your credit cards and loans. Look at homes in your area of interest to gauge the general market value of those with features you want, and use a mortgage calculator to estimate what the down payment, monthly mortgage payment and property taxes will be. Now that you know where you are starting from, you can begin (or continue) the process.
Ready, set, save: With your estimated home costs in hand, you can determine what amount you need to save before you can make a purchase. There are some great online and mobile tools to help you create and track your monthly budget so you can maximize your savings every month; mint.com is a great option. If you already have enough savings for a down payment, make sure your monthly income can support your future mortgage payments by saving the difference in expenses for a period of time.
Create a plan: Before you start shopping for your home, be sure to have a plan. You probably already have an idea of what you are looking for, but you can make your search easier by creating a list of what features are necessary and desired for your home. We all have priorities for our homes, be it location, size, style, number of rooms, amenities or countless other features, so make sure you know what you are looking for and what you can’t live without. If you have a deadline for moving, keep it front-of-mind as you go through the process.
Find an agent: Once you (and your partner and your children) know what you are looking for in your home, find a real estate agent that can help you find the right place for you. Selecting an agent is a personal process, as well as financial relationship. If you have friends or family that have worked with an agent for their own real estate needs, ask for referrals. If you don’t know an agent yet, you can find an office local to the area where you are interested in buying, and interview brokers. Keep in mind you will be spending a lot of time with your agent, so you need to feel confident he or she understands your needs; the deal-breakers, wish list, budget and timeline. A good agent will work with you in refining these to reflect the reality of the market, and guide you through the entire process from pre-approval, home searching, closing and resources, to get you into your new home.
Pre-approval: If you already have a real estate agent, they can help you find a lending officer. You can also work with your bank of choice to find a loan that works for your financial situation and start the approval process. The amount the bank is willing to loan you will determine the top-cost of the home you can purchase.
Purchasing Process: Your agent will be able to guide you through the purchasing process, from pre-approval, to purchase and sale agreement, to inspection, financing and closing. If this is your first home, keep in mind there are some factors that affect the purchase of your home. If you are looking at a short sale, a foreclosure or bank owned home, the process will take longer than a traditional home sale from the owner or developer of the property. Be prepared to work with your broker heavily during closing, as the negotiating process is a critical aspect of getting the home you want for the best price. Your agent can also offer you tips to avoid hiccups during your financing process, such as avoiding any major purchases until after your home has closed; even furniture purchases for your new home can create financing issues. To learn more information about the home-purchasing process, go here.
Setting up a home: Once you have closed on your home purchase and are ready to start making your new home yours, create another checklist to make your transition as easy as possible. Your agent will likely have some useful resources for you, from moving companies, to local utilities and near-by amenities, that can help make the process smooth and efficient. If you are moving with small children, here are some tips to help you through the process and give your kids the best transition possible. Once you are moved and settled, you can start the process of creating the dwelling of your dreams.
For more information on Windermere Real Estate please contact us here.
Moving on up!
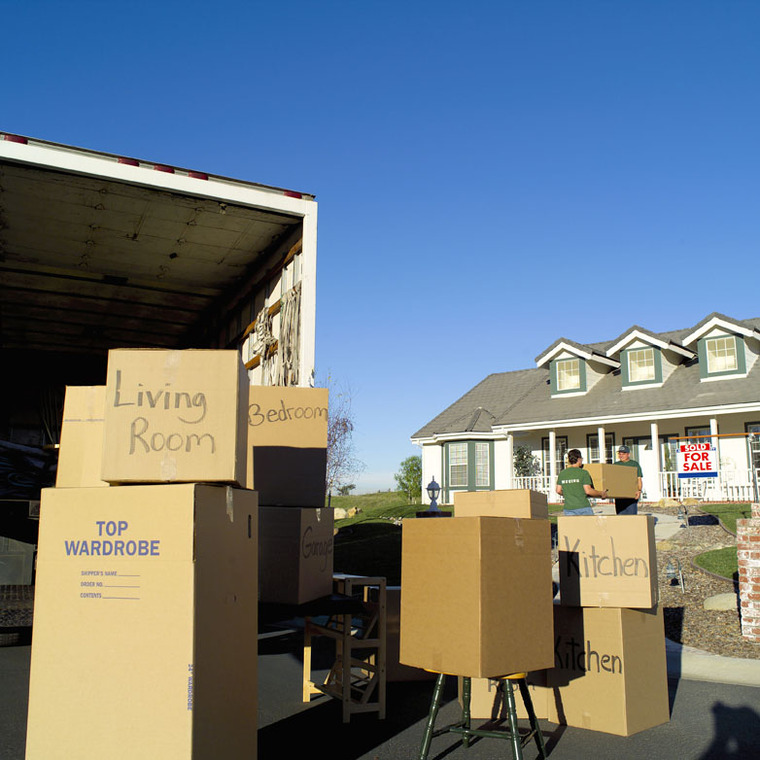
 Moving is stressful, whether it is across town or cross-country. Once you have closed on your house, the reality of packing, moving, and setting up a new home can become overwhelming. While no list can make a move “stress-free”, planning ahead and staying organized can help make your move a little smoother. Here is our list of tips:
Getting started:
· Once you know your prospective move date set up a quick timeline to make sure you can get all the important tasks done and ready in time for your move.
· Consider how much stuff you have by doing a home inventory. This can help you decide whether you need to hire movers to help you or if you will be managing your move on your own. Many moving companies supply inventory lists to help you assess the size of truck you will need. You can use your list as double duty for insurance purposes later.
· As soon as you decide how you will be moving, make your reservations. In general, moving companies and truck rental services are over-booked at the beginning and very end of the month. If you are planning on hiring a moving company, contact a few in your area for a price quote. To find companies ask your real estate agent, family, or friends, and consult online reviews. It is also a good idea to request a quote and compare companies.
Preparing for your move:
· Moving is a great opportunity to get rid of clutter, junk, or outdated items. Set aside some time to sort through your closets, storage spaces, files, drawers, and more. Go through cluttered areas and organize items by “keepers”, “give-aways” and “garbage”. You will have less to pack and an opportunity to update after you move. Contact a local nonprofit organization for your donations; some will arrange to pick up larger donations like furniture. If you have items of value, eBay or craigslist are good options.
· Changing your address is one of the more tedious tasks in the moving process. You will need to change your address with the United States Post Office. You can find the online form here: https://moversguide.usps.com/icoa/icoa-main-flow.do?execution=e1s1.
· You will also need to change your address with each account you have. Here is a list to get your started:
· Employers
· Bank(s)
· Utilities (Electric, Water/Sewage, Oil/Gas)
· Cable/ Telephone
· Cell phone service
· Credit Cards
· Magazine subscriptions
· Insurance companies (auto, home/renters, health, dental, vision, etc.)
· Pharmacy
· Other personal services
Let the packing begin:
· Before you start packing, it may help to visualize where everything you have will go. Perhaps furniture will fit better in a different room? Consider the floor plan of your new home and figure out what will go where. This will aid in packing and labeling as you box everything up.
· Use a tool like floorplanner.com to plan where furniture and items will go.
· When it comes to packing you have some options. You can work with a service that provides reusable boxes for moving or you can reuse or purchase cardboard boxes. Make sure you have enough boxes, packing tape, dark markers, and packing paper.
· Pack rooms according to your floor plan. Label boxes with contents and room. This will make it easier to unpack your home, knowing where everything is going.
· Real Simple magazine has some great tips on packing for your move.
· If you have to disassemble any of your furniture, make sure you keep all the parts and directions together.
· Make sure you set aside your necessities for the day you move. Being tired and unable to take a shower or make your bed can be hard at the end of a long moving day. Here are some ideas of what you may like to pack in your “day-of-move” boxes.
· Clean linens for the beds, pillows and blankets
· Clean towels
· Shower curtain, liner and hooks
· Toiletries, hand soap, tooth brush, etc.
· Disposable utensils, cups, napkins, etc
· Rolls of toilet paper
· Snacks and water
· Change of clothes
· Tools for reassembling furniture, installing hardware, and hanging photos
Making your move
· Come up with a game plan with your family, so everyone has a role and a part to play
· Once the house is empty, do a once over on your old place to make sure it is clean for the next owners/occupants. Here is a useful checklist for cleaning.
Warming your new home
· Once you have settled into your new home, warm it up by inviting friends and family over to celebrate. Here is a great infographic about housewarming traditions and symbolism.
· Announce your move to far-away friends and family through moving announcements to make sure you stay on the holiday card mailing list.
Do you have any other tips or advice for achieving a smooth move?
For more information on the Windermere Evergreen team please contact us here.
Keep Herbs Alive and Well in Winter With These 5 Tactics
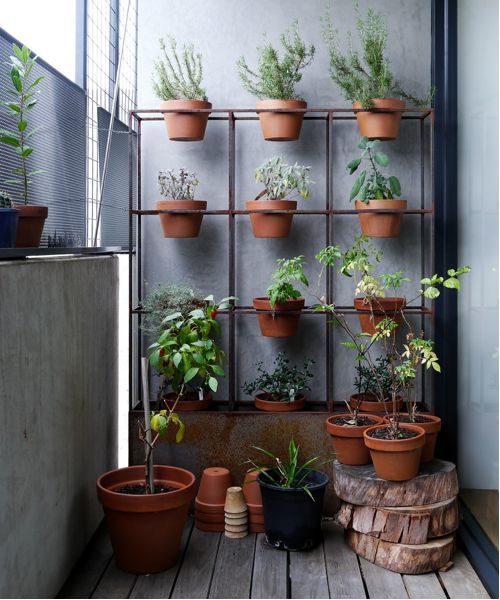

Temperatures may be dropping, but that doesn’t mean we have to bid farewell to our herb gardens. Cold-hardy herbs, such as chives, mint, oregano, parsley, sage and thyme, can often survive cold-winter temperatures while continuing to produce flavorful foliage, as long as they are provided with some protection or grown indoors. Even herbs like rosemary that are more cold-sensitive can survive winter using additional methods of protection. Let’s explore different ways we can prolong the herb harvest and enjoy the fresh taste of our favorite herbs throughout the cold of winter.
1. Protect herbs from the cold by placing them in a cold frame or cloche. Covering herbs helps trap the heat that rises from the soil, elevating the temperature inside by several degrees. This can extend the growing season in both fall and spring.
Cold frames are topped with glass panes that slope downward and are situated so they face south. This ensures that the most sunlight will reach the plants inside, creating an environment that is several degrees warmer than outside.
Cloches are a smaller and more portable way to protect plants from the cold. Traditional ones are bell-shaped and made from glass. They can be expensive, but you can make your own by cutting off the bottom of a 1-gallon plastic milk jug or other large plastic container. Place each one over individual herb plants and nestle the bottom inch or two of the cloche into the soil to anchor it.
2. Add a thick layer of coarse mulch over herbs. Many herbs can grow through the winter under the insulation provided from straw, shredded bark or other coarse mulch. In areas that experience moderate-winter cold, USDA Zone 6 and warmer, herbs will continue to produce some new growth despite some winter cold. Simply pull back the mulch and cut the herbs you need, then cover them back up. While they won’t produce as much new growth as they do in the warm season, you should be able to obtain a small harvest. Don’t worry if a layer of snow falls, as it will provide additional insulation for the herbs below. Once spring arrives, you can turn the mulch into the soil.
3. Pot up herbs and move them into a frost-free greenhouse or sun porch. If you’re growing herbs in the ground, you can transfer them to pots and move them to a protected spot. Select the herbs you want to keep growing over winter, such as chives, oregano, sage and thyme. Cut them back to 1 inch tall and, using a sharp shovel, divide them at their base, making sure to include the roots so each one will fit into the container. Use well-draining planting mix in the containers and plant each herb in a separate pot. They will grow back and you’ll be able to harvest their flavorful leaves until you transplant them back into the garden once spring arrives.
4. Grow herbs in front of a sunny window. Herbs can be grown from seed or cuttings and make a great addition to a sunny kitchen window that gets at least six hours of sunlight. If using artificial lighting, 14 hours is usually sufficient. The temperature should range between 60 and 70 degrees Fahrenheit, or 15.6 and 21.1 degrees Celsius, for best results. You can transplant herbs from the garden or begin from scratch by sowing seed.
The rewards of growing herbs indoors throughout the winter are great when the fresh flavor of summer is within arm’s reach. Chives, oregano, parsley and thyme are just a few of the easiest herbs to grow on a sunny windowsill. Use a well-draining planting mix in your container. Water deeply when the top inch of soil is almost completely dry.
5. Extend the life of fresh herbs by putting them in water. Herbs such as basil and mint grow quickly when placed in a container of water for a few weeks. Other herbs that work well in water are sage, oregano and thyme. When placed in water, they begin to produce roots and will grow new leaves. This is a useful way to prolong the harvest, whether you bring in cuttings from the garden or buy fresh herbs at the grocery store.
The process is easy. Simply cut the ends of each stem and put them in a small jar or cup filled with water. Be sure to remove any lower leaves so they won’t be submerged in the water. Place on a sunny windowsill.
The leaves produced indoors will be thinner and slightly less flavorful than those grown outdoors but will still add welcome flavor to your favorite dishes. Refill the water as needed and enjoy the prolonged harvest for several weeks to come.
Related: Elevate Plants to Reach Sunny Windows With These Plant Stands
By Noelle Johnson, Houzz
For more information on Windermere Real Estate please contact us here.
