
 Facebook
 X
X
 Pinterest
 Copy Link
5 Mid-century Modern Homes That Make the Most of Their Small Design

Posted in Houzz.com and Architecture by Houzz.com
Midcentury modern homes were small out of necessity. Money was in short supply after World War II, so architects and builders had to keep houses compact yet functional to stay within homeowners’ budgets. At the same time, lifestyles were changing. Smart architects took on a new approach and designed homes with an open feel, which differed greatly from the boxy designs of the previous era.
Related: Why You Should Embrace Your Midcentury Modern Kitchen

Midcentury Modern 1: Flavin Architects, original photo on Houzz
I’ve been enamored with midcentury modern homes since my childhood in California, where I was privileged to spend time in the intimate houses designed by Frank Lloyd Wright apprentice Mark Mills. Mills was the on-site architect for Wright’s famous Walker House, or Cabin on the Rocks, in Carmel, California, pictured. It was during this time that Mills learned an important lesson from Wright: Reject a larger house in favor of a modest home with flowing spaces and no excess.
The following ideas show how midcentury modern homes beautifully make the most of their space in ways that can easily be incorporated in homes today.

Midcentury Modern 2: Wheeler Kearns Architects, original photo on Houzz
1. Open floor plan.
Above all else, the open floor plan is the defining characteristic of midcentury modern homes. Closed-off rooms gave way to flowing spaces that strung one room to the next to form fluid kitchen, living and dining areas.
In a small home, the key to making the open floor plan work is to understand which rooms need privacy, and when. Of course, bedrooms and bathrooms need separation from the main areas of the home, but it’s also good to consider other areas that need privacy: for example, a study where a parent can work without interruption while the kids play nearby.
In this lake house by Wheeler Kearns Architects, the common areas are located in a centralized area, while the more private areas are off to the side or tucked away on another level.

Midcentury Modern 3: Balodemas Architects, original photo on Houzz
2. Expanded sightlines.
The tendency of midcentury modern homes to have open floor plans speaks to the elegant details often seen within these houses. Without trying to be too sparse, midcentury designers included functional details in their homes that were as uncomplicated as they were beautiful. Finding the balance between sophistication and openness was in the hands of the architect.
Take, for example, the stairs in midcentury modern homes. In this remodel of a midcentury home by Balodemas Architects, they preserved much of the original stair and design. The riser, or the vertical part that connects the stair treads, was simply left out for a lighter appearance. The stair was no longer in a hall but fully opened up and integrated into a room. Walls were often dispensed with entirely. Instead, partial-height screens inspired by Japanese shoji were used to subtly separate spaces.

Midcentury Modern 4: Steinbomer, Bramwell & Vrazel Architects, original photo on Houzz
3. An instance to avoid “open.”
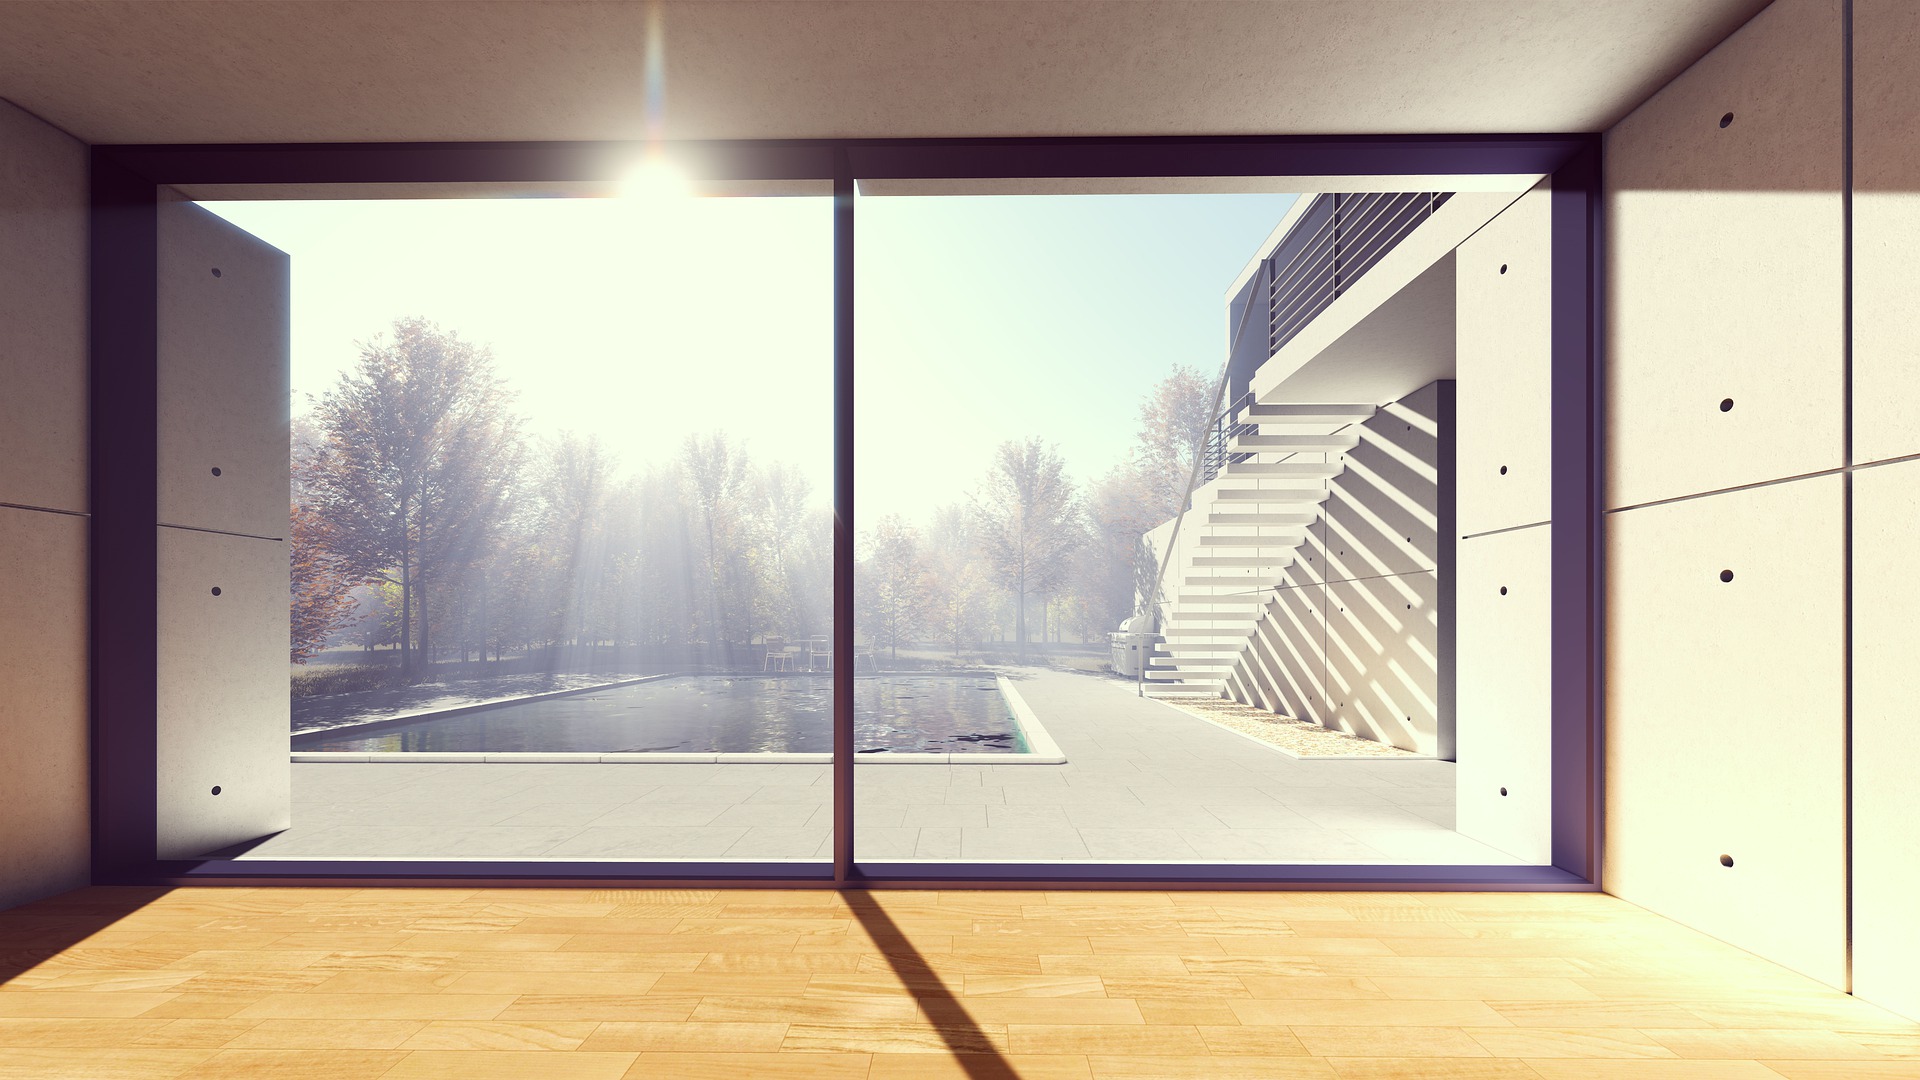
While photographs of midcentury modern homes often feature great walls of glass, what’s often not shown, perhaps because they are not as photogenic, are the equally generous opaque walls.
These walls are key to the home’s aesthetic success. They provide a protective backing to the composition, since the opaque side of the home often faces the road, as with this house by Steinbomer, Bramwell & Vrazel Architects. Although the back of the house is open, with lots of glass and a sense of ease between inside and out, the street-facing side would never give that away. An opaque wall creates a boundary to the outside world while extending the perceived size of the home. Walls of glass are expensive, so opaque walls are also an economical design move.

Midcentury Modern 5: Flavin Architects, original photo on Houzz
4. Everything in its place.
Thoughtful storage is a another key aspect of what makes a small midcentury home completely livable. Most midcentury modern homes, particularly those on the West Coast, had no basements or attics, so storage closets needed to be located among the main living spaces. In part, the answer was to do more with less by having well-designed storage throughout and daily items close at hand, as in this kitchen. This has to be married to an ethic of keeping only what you need and having periodic yard sales.

Midcentury Modern 6: Koch Architects, Inc. Joanee Koch, original photo on Houzz
5. Display with a purpose.
In a small home with innovative but limited storage, it’s important to have display areas for the pieces that don’t need to be tucked away in drawers or closets. This was done beautifully in midcentury modern homes by integrating display areas as a means of aiding with the potential conundrum of scarce storage.
This restoration by Koch Architects shows this exact notion at work. Every other step in the stair has an integrated bookshelf. This would make a perfect rotating library with a range of titles easily seen while ascending the stair.
By Colin Flavin, Houzz
Affordable Tips To Up Your Home’s Curb Appeal
Posted in Living and Windermere by Kenady Swan

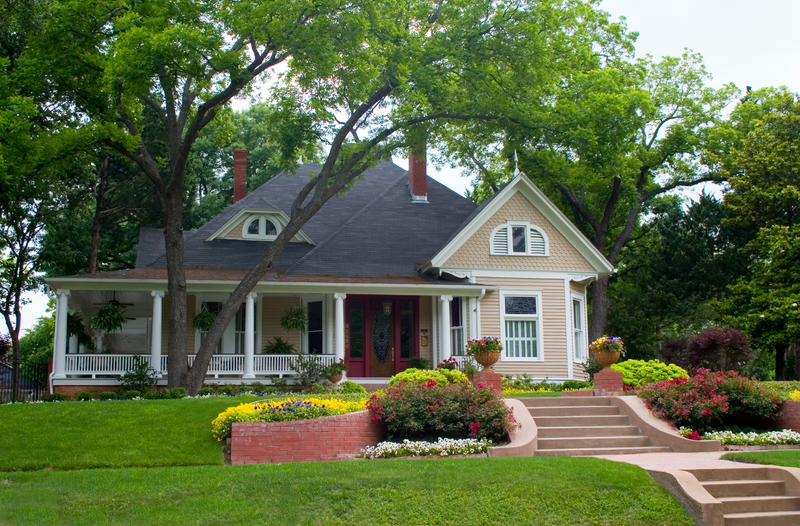
You’ll never have a second chance at a first impression, so let’s make it count! When it comes to upping your home’s curb appeal, there are plenty of small changes you can make that have a big impact. And best of all, you don’t need to call in the pros or spend a fortune to get beautiful results. Below are some helpful and affordable tips.

A Well-Maintained Yard
Mowing: The first step to a well-manicured lawn is to mow it regularly. The experts recommending mowing high because mowing it too short can damage the grass and allow weeds to set root.
Weeds: To prevent weeds like crabgrass use a pre-emergent herbicide in early spring. These herbicides manage the weeds by stopping the seeds from sprouting in your lawn. Broadleaf weeds like dandelions can be stopped by applying granular weed control products.
Feeding: Lawns consume mostly nitrogen, so look for mixes of fast and slow release fertilizers; they will feed your lawn over time while keeping it lush and green.
Watering: Nighttime watering can result in long spans of moisture on the blades, potentially exposing your grass to disease. Consider watering your lawn in the morning – the sun helps dry out the blades throughout the day.
Flowers: You can quickly and affordably dress up your yard with colorful pre-made flower pots and containers. When placing your flower pots and containers remember that asymmetrical arrangements and staggering plants will provided the liveliest setting.

Dress up the Front Door and Porch
Paint: A fresh coat of paint in a pop color can give your home a well-deserved facelift. If you are hesitant to add a bright color to your front door, check out our article Energize Your Home This Winter With Bright Hues.
Replace Old Hardware: Clean off any dirty spots around the door knob, and use a metal polish on the fixtures. Change out house numbers for an updated feel, put up a wall-mounted mailbox, or add an overhead light fixture. Keep in mind that well thought through elements, instead of mix-and-match pieces, will add the most curb appeal.
Create Perfect Symmetry: Symmetry is one of the simplest design techniques to master and is the most pleasing to the eye. Maintain symmetry by flanking your front door with two sidelights (just make sure that your hardware matches); find two urn planters or a unique visual detail to put on either side of your door.
Home Decor Through the Decades

As we celebrate our 45th anniversary here at Windermere, we’re feeling a bit nostalgic. The fundamentals of helping our clients buy and sell homes haven’t changed much over the past 45 years, but the way we decorate our homes sure has. Let’s take a trip down memory lane and explore interior design trends from the past four decades—the good (farmhouse sinks), the bad (macramé owls), and the ill-advised (carpeted bathrooms!).

1970s
Inspired by the hippie movement, interior design in the 1970s centered around bringing the outdoors inside. Wood paneling could be found in bedrooms and basements alike, and wood accents adorned appliances in the kitchen.
Earth tones dominated throughout the house. If your refrigerator wasn’t avocado or burnt sienna and your shag carpet wasn’t harvest gold, you were not keeping up with the times.

1980s
In the 1980s, we wanted to make homes as cozy as possible, which for a lot of folks meant chintz, Laura Ashley–inspired florals, and tons of pastels.
The “country” look gained huge popularity during this decade as well. Even high-rise city apartments were filled with objects that seemed more at home on a ranch in Texas, including bleached cow skulls and weathered-wood dining tables and chairs.

1990s
Perhaps as a reaction to the excess of the decade before, the 1990s saw a rise in Japanese-inspired minimalism. Sparsely furnished rooms with rock gardens, clean lines, and simple colors were all the rage.
On the opposite end of that spectrum was the shabby chic craze. Distressed furniture, soft colors, and oversized textiles combined to create this look.
Texturized walls were also a big hit. Wall paper and paint brushes were out, and sponges became the way to get the chicest look for your home.

2000s
It’s hard to believe, but we’re nearly a decade out from the early aughts. And that perspective makes it easier to spot trends that felt of-the-moment only a few years ago but are waning in popularity today. One example is Tuscan-style kitchens. It seemed every new home—especially homes on the upper end of the market—included a kitchen with stone tiles, granite countertops, hanging vines, and beige and tan tones.
Another popular item from the early 2000s that is now facing a bit of a backlash is mason jars. Once a staple of homes looking to incorporate a rustic feel, mason jars are now so common in decorating both homes and restaurants that they no longer feel special or nostalgic.

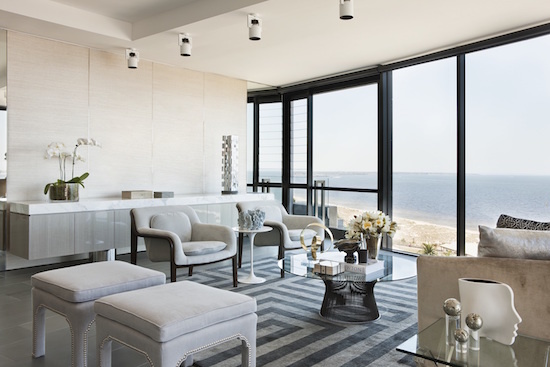
Today
Trends are always evolving, but if you’re looking for some cutting-edge interior design ideas for 2018, here are a couple to consider.
Embrace super saturated colors, especially warmer tones like yellow and red. These bold hues no longer need to be saved for accent pieces like pillows or lamps. Larger pieces of furniture and entire walls make a bigger splash.
Incorporate geometric patterns. There’s really no wrong way to get on board with this trend. Whether your couch features large circles, you add patterned backsplash in your kitchen, or you cover your ceiling with octagonal wallpaper, geometric shapes will help your home feel fresh.
Why Not White Marble?
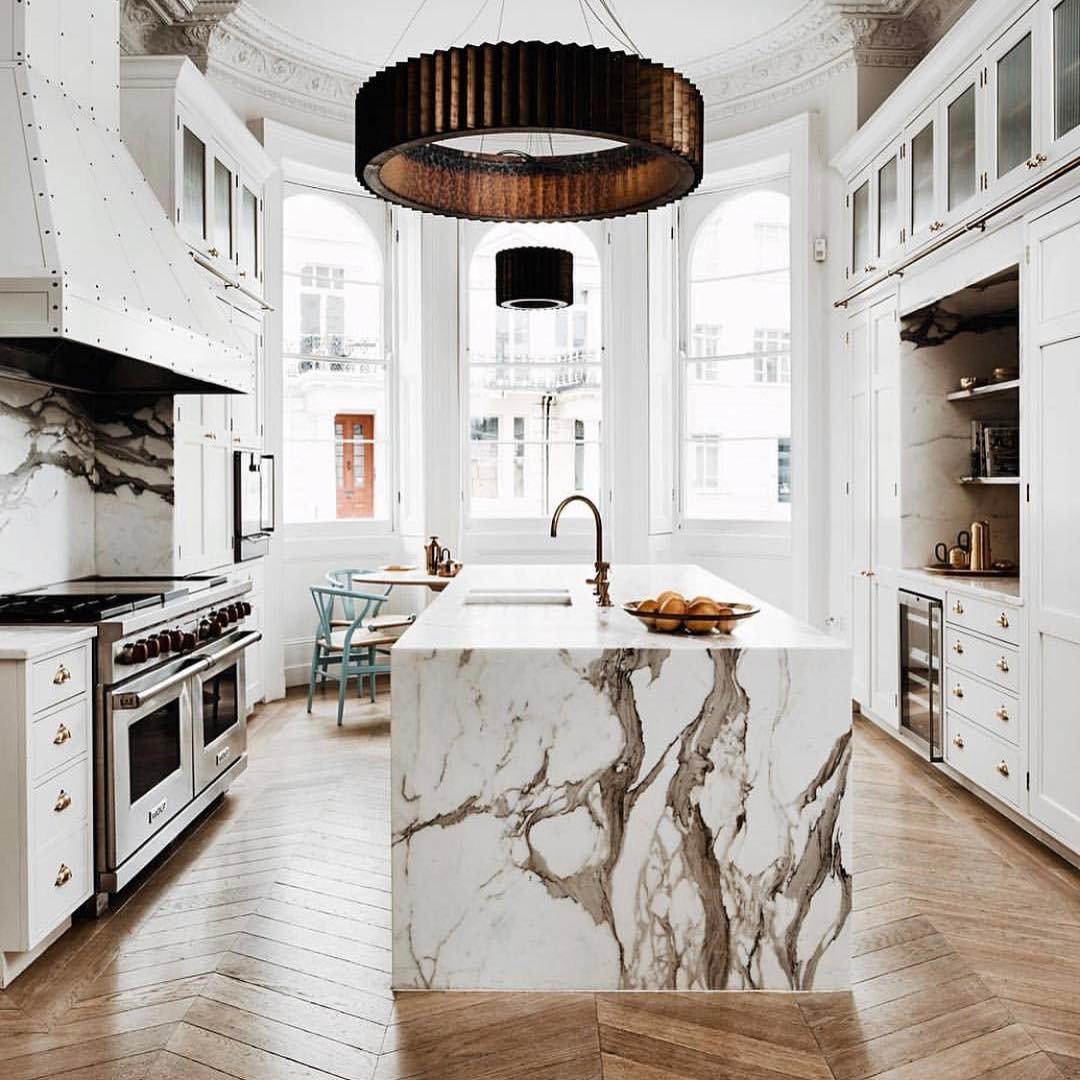

Are you thinking about replacing your kitchen or bathroom countertops? The choices are endless; tile, granite, soapstone, wood, or maybe marble? White marble often gets a bad rap because it’s a more porous metamorphic stone than most (which means it’s prone to stains and scratches), but we beg to differ, and here’s why.
White marble is as timeless as it is modern. Adding white marble to your kitchen or bathrooms is like bringing home flowers for your significant other; always a good idea. It looks great on kitchen counters, but also just about anywhere in your bathrooms, from the floor to the shower walls. Adding white marble countertops to a dressing vanity in bedrooms is also a great way to incorporate it throughout your house.
After you’ve made the decision to install white marble into your home, you’ll need to decide on a finish. Honing gives a matte finish, whereas polishing creates a shiny, reflective surface. If you want to reduce etching, choose a honed finish instead of a polish. If you don’t mind some added etching, then polished white marble is as stunning as it sounds.
How do you keep your marble happy? Make sure to apply a seal prior to using it. To reduce staining, wipe away spills immediately, and only use a neutral detergent to clean your marble. These simple things will keep your white marble in shipshape condition.
When it comes to your marble, it’s more like you than you think. Marble goes through good times and bad times and some scars fade better than others. It will never be perfect, but in the end, we think you’ll love it—imperfections and all.
Check out white marble looks we love on Pinterest.
6 Foyers That Invite in Style
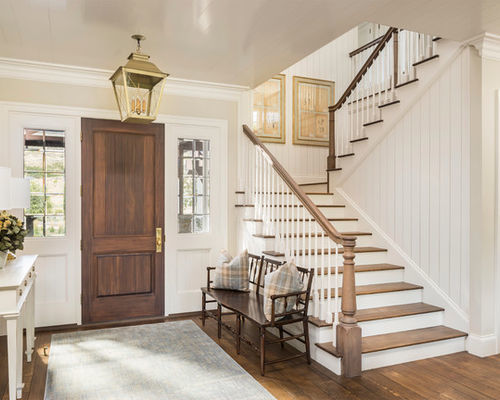

Entryway 1: Jackson and LeRoy, original photo on Houzz
With a side entrance to your home, you can be a little more forgiving when it comes to messes. But with a front-door entry, through which you and your guests get a first impression of your home, you’ve got to be a little more on top of your style and storage game. The following are some of the most popular front-entry photos recently, as measured by the number of people who saved them to their Houzz ideabooks from January through March. Let us know which will inspire your next project
A classic wooden bench offers a spot to take off and put on shoes in this farmhouse-style entryway in Utah.
Related: Wipe Your Shoes on a Durable Outdoor Rug

Entryway 2: Nicole Benveniste Interior Design, original photo on Houzz
Benjamin Moore’s Plaster of Paris paint on the walls sets the soothing tone for this spacious San Francisco entry. A large painting featuring pale swaths of color hangs over a few well-chosen accessories atop a weathered wood table, starting this home off on the right foot.

Entryway 3: Brian Paquette Interiors, original photo on Houzz
Here, a burl-wood-type table and vibrant abstract art create movement and excitement.
Related: Flower Vases for the Entryway

Entryway 4: Tim Barber Ltd Architecture, original photo on Houzz
A rich wood built-in helps organize this Los Angeles entry. A frosted, ribbed glass window obscures the view into the living room.

Entryway 5: NEST Interior Design Group, original photo on Houzz
An eclectic mix of art and accessories beckons guests into this Houston home. A table offers a spot for keys and wallets, while wire baskets below can handle shoes and bags.

Entryway 6: Fluidesign Studio, original photo on Houzz
Creamy shiplap walls, rich wood floors and a wood console table establish a refreshing air in this Minneapolis home.
By Mitchell Parker, Houzz
13 Appliance Tips & Hacks for Household Chores

Modern home appliances make our lives so much easier: They tackle dreaded household chores, saving us time and effort. There are lots of ways to use them, however, that you may not have thought of before. From cleaning your ceiling fixtures in the dishwasher to vacuuming your pet, here are 13 little-known tricks for getting more than your money’s worth from your appliances.
- Sanitize small toys and more. Use your dishwasher to wash and sanitize teething rings, small plastic toys, mouth guards, and even baseball caps. Place items on the top rack and run the dishwasher as usual with detergent (without any dirty dishes). Put smaller items in a small mesh laundry bag so that they don’t move around.
- Clean ceiling fixtures. At least once or twice a year, remove and clean your glass ceiling fixtures and light covers in an empty dishwasher. Run the machine on the normal cycle.

- Eliminate wrinkles from clothing. To smooth out wrinkled clothes or linens left too long in the dryer, toss a damp, lint-free cloth in with them. Run the load on the lowest setting for 10 to 15 minutes. Newer dryers also feature a steam setting that removes wrinkles and refreshes clothing between wears.
- Disinfect sponges and dishcloths. Kitchen sponges and dishcloths contain billions of germs. Clean and disinfect them daily by zapping them on high in the microwave for 2 minutes to kill germs.
- Freshen up your curtains. Vacuum heavy drapes with the upholstery attachment. Use the dusting brush attachment for lighter drapes. Wash sheer curtains in the washing machine on the delicate cycle, then hang them up while they’re damp to prevent wrinkles.
- Remove wax from fabric or carpet. To get rid of wax on a tablecloth, place it in your freezer until the wax is hard. Then put a flat paper bag over the wax and another under the fabric. Iron the top bag with a medium-hot iron until all the wax transfers to the bag. To remove wax from a carpet or rug, place an ice pack on the spot until the wax hardens. Shatter the wax and vacuum up the chips.
- Clean baseboards. Dusting baseboards can be a backbreaking chore. Use your vacuum cleaner and the dusting brush attachment to avoid having to bend down. Do the same to clean chair and table legs.

- Organize your fridge. Use the built-in features of your refrigerator to organize food by category. Designate certain shelves or areas for leftovers, preferably front and center, so you don’t forget they’re in there. Use special-purpose bins for their intended use: crispers for vegetables, deli trays for deli meats and cheeses, cold storage trays for meats. Newer models also feature convertible cooling zones to keep food fresh.
- Dust blinds. Extend the blinds fully and turn the slats to the closed position. Use the dusting brush attachment on your vacuum cleaner to clean the slats from top to bottom. Then open and reclose the slats in the opposite direction and repeat the process.
- Clean your microwave. The best time to clean your microwave is immediately after using it. Thanks to residual steam, all you have to do is wipe it out with a paper towel or damp sponge. To clean old messes, microwave 2 cups of water on high for 5 minutes. The steam will soften cooked-on spills, which you can wipe off with a paper towel or cloth.

- Exterminate dust mites. Dust mites live off human and animal dander and other household dust particles. They thrive in sofas, carpets, and bedding. Use the upholstery attachment to vacuum your mattress and upholstered furniture regularly to minimize dust mites. Be sure to empty the canister in an outdoor trashcan.
- Groom your pet. If your dog or cat doesn’t hide when you get out your vacuum cleaner, try using the dusting brush attachment to brush your pet. It’s a gentle way to collect shedding fur.
- Remove grime from shower liners. Wash plastic shower curtain liners in the washing machine with hot water and detergent on the regular cycle. Throw in a small bath towel to help “scrub” mildew and soap scum off the liner. Then rehang the liner and let it air-dry.
Have you found any unusual cleaning hacks for your appliances? Share in the comments below!
Organizing and cleaning expert Donna Smallin Kuper writes for The Home Depot about easy organization hacks, including the best ways to use your appliances. To view The Home Depot’s selection of appliances, click here.
For more information please contact us here.
This article is editorial content that has been contributed to our site at our request and is published for the benefit of our readers. We have not been compensated for its placement.
12 Tips for Making Your Bedroom Cozier

At the end of a long day, your bedroom should be a sanctuary of comfort that welcomes you in. But, as a room that guests rarely see and in which homeowners spend most of their time with their eyes closed, its upkeep frequently gets pushed to the bottom of the to-do list. Thankfully, there are some little design tricks that can make a big difference. Turn your bedroom into a restful retreat when you up its coziness factor with a few of these easy ideas.
- Layer textures. Sheepskin rugs, a down comforter, plush pillows and knit blankets can add a softness to the room that will make you want to sink right in. Lift these textures upward, with a canopy, tufted headboard, billowy curtains and hanging textiles (like a weaving) so even the walls and ceiling feel snuggly.
- Pick the right paint. Dark, saturated colors make a room feel like it’s embracing you, which is ideal for setting a sleepy environment. But if you’re nervous to commit to a dark color on the wall, choose a pale dusty blue, sage green or another light natural color for a soothing tone (just steer clear of energetic hues). Have you ever wanted to sleep on a cloud? Go with all-white paint and decor which makes even a basic bedroom feel soft and spa-like.
- Personalize it with reminders of the places and things that make you feel at home. Do you have a fondness for flowers? Bring floral patterns in on your textiles. Do you dream of vacation at the lake? Frame a photo of your favorite spot! Photos or paintings of uncluttered natural landscapes—like a sunset reflecting on water or a hammock under the shade of an oak—can rekindle memories of relaxation and are perfect for creating a sense of calm.
- Add mood lighting. Soften the light to mimic dusk for an intimate mood with dimmer switches, lamps, lanterns or even string lights. Just make sure you can reach the switch from bed, so you don’t have to disturb your peace to get up and turn it off when you’re ready to roll over and fall asleep.
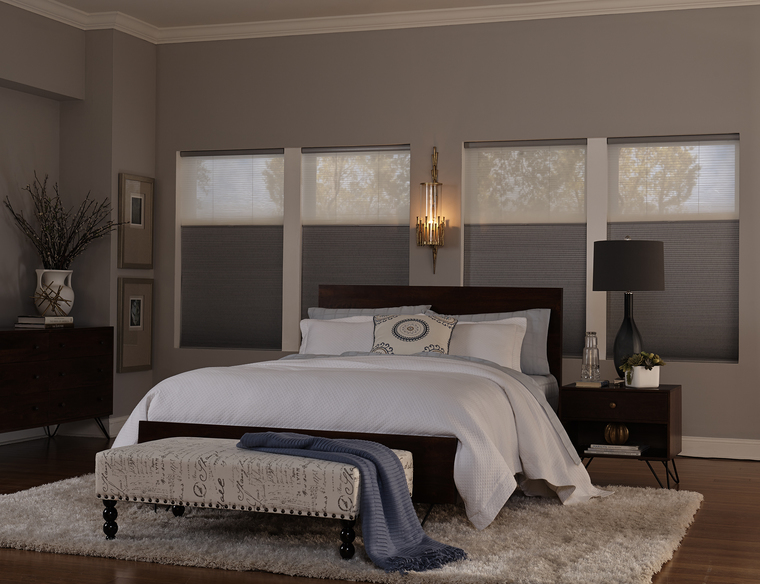
- Skip metallic finishes. Choose warm natural decor options like wood and fabric instead of cold, manufactured metallics. This goes for everything from your bedroom furniture to window treatments. Faux wood blinds, especially when paired with floating curtains, fit with a cozy aesthetic and let you filter out harsh sunlight and maintain privacy for a truly sheltered slumber.
- Bring on the books! Stacks of good reads invite you to snuggle in and get lost in another world. A true retreat is a room with plenty of books that begs you to stay.
- Fix up—or fake—a fireplace. If your bed sits hearthside, embrace this romantic accent with styled logs and a decorated mantle. If you don’t have such a luxury, create a faux fireplace to add comfort and warmth through your décor: Arrange oversized candles and lanterns safely within a homemade hearth to bring in that cozy fireside feeling without changing the structure of your home.
- Keep the room uncluttered. When you want to settle in, a mess distracts you from finding comfort, so minimize the amount of stuff that makes it to your bedroom. Watch your nightstand, which often becomes a catch-all, by making a point to rehome any wandering wares now, and put things away as soon as they enter the room in the future. If you’re apt to let laundry pile up, keep it behind the closed doors of your closet so it doesn’t crowd your peace.
- Create a sense of timelessness. Tuck clocks and electronics away so they’re nearby if you need them, but their wires and harsh silhouettes aren’t reminding you of life outside your sanctuary. The hush that falls in a room devoid of gadgets will allow you to easily disengage from the stresses of reality.
- Rethink your bedding. Add a pillow-top pad to your mattress so it feels like your bed is hugging you when you climb in. Or, bring in a contoured body pillow which actually can hug you! Linen sheets feel luxe compared to cotton and are a simple swap to boost your bower. Many people also swear by skipping the top sheet while dressing their beds, which allows them to burrow directly into a fluffy comforter.
- Appeal to your sense of smell. Aromatherapy can have a huge impact on your perception of a space, so find some soothing essential oils or a sweet candle to blanket the room with an ambiance you adore. As soon as you open the door, you’ll be eager to plunge into your little oasis.
- Nestle into nooks. A window seat, a reading nook or an upholstered seating area are all inviting spaces that can draw you in from the doorway. The more intimate alcoves you can create, the cozier your bedroom will feel!
Flooded with soft lighting, plush textures and other comfy touches, your bedroom environment will envelope you at day’s end. And, perhaps even better than the idea of your bedroom refresh itself, is knowing that none of these tips take longer than a weekend to complete! So, slide into your slippers as you settle on which cozy updates you’ll select for your new favorite room of the house.
For more information on Windermere Evergreen, please contact us here.
A Home Addition: What to Consider Before Starting to Build


Adding on to your current home may be your best bet if you’re short on space, but you don’t want to move or can’t find another house in the area with all the qualities you’re seeking. It’s also an attractive option if the house you have is lacking just one significant element (a family room, another bedroom, a larger kitchen, a separate apartment, etc.).
On the other hand, even a modest addition can turn into a major construction project, with architects and contractors to manage, construction workers traipsing through your home, hammers pounding, and sawdust everywhere. And although new additions can be a very good investment, the cost per-square-foot is typically more than building a new home, and much more than buying a larger existing home.
Define your needs
To determine if an addition makes sense for your particular situation, start by defining exactly what it is you want and need. By focusing on core needs, you won’t get carried away with a wish list that can push the project out of reach financially.
If it’s a matter of needing more space, be specific. For example, instead of just jotting down “more kitchen space,” figure out just how much more space is going to make the difference, e.g., “150 square feet of floor space and six additional feet of counter space.”
If the addition will be for aging parents, consult with their doctors or an age-in-place expert to define exactly what they’ll require for living conditions, both now and over the next five to ten years.
Types of additions
Bump-out addition—“Bumping out” one of more walls to make a first floor room slightly larger is something most homeowners think about at one time or another. However, when you consider the work required, and the limited amount of space created, it often figures to be one of your most expensive approaches.
First floor addition—Adding a whole new room (or rooms) to the first floor of your home is one of the most common ways to add a family room, apartment or sunroom. But this approach can also take away yard space.
Dormer addition—For homes with steep rooflines, adding an upper floor dormer may be all that’s needed to transform an awkward space with limited headroom. The cost is affordable and, when done well, a dormer can also improve the curb-appeal of your house.
Second-story addition—For homes without an upper floor, adding a second story can double the size of the house without reducing surrounding yard space.
Garage addition—Building above the garage is ideal for a space that requires more privacy, such as a rentable apartment, a teen’s bedroom, guest bedroom, guest quarters, or a family bonus room.
Permits required
You’ll need a building permit to construct an addition—which will require professional blueprints. Your local building department will not only want to make sure that the addition adheres to the latest building codes, but also ensure it isn’t too tall for the neighborhood or positioned too close to the property line. Some building departments will also want to ask your neighbors for their input before giving you the go-ahead.
Requirements for a legal apartment
While the idea of having a renter that provides an additional stream of revenue may be enticing, the realities of building and renting a legal add-on apartment can be sobering. Among the things you’ll need to consider:
- Special permitting—Some communities don’t like the idea of “mother-in-law” units and therefore have regulations against it, or zone-approval requirements.
- Separate utilities—In many cities, you can’t charge a tenant for heat, electricity, and water unless utilities are separated from the rest of the house (and separately controlled by the tenant).
- ADU Requirements—When building an “accessory dwelling unit” (the formal name for a second dwelling located on a property where a primary residence already exists), building codes often contain special requirements regarding emergency exists, windows, ceiling height, off-street parking spaces, the location of main entrances, the number of bedrooms, and more.
In addition, renters have special rights while landlords have added responsibilities. You’ll need to learn those rights and responsibilities and be prepared to adhere to them.
Average costs
The cost to construct an addition depends on a wide variety of factors, such as the quality of materials used, the laborers doing the work, the type of addition and its size, the age of your house and its current condition. For ballpark purposes, however, you can figure on spending about $200 per square food if your home is located in a more expensive real estate area, or about $100 per food in a lower-priced market.
You might be wondering how much of that money might the project return if you were to sell the home a couple years later? The answer to that question depends on the aforementioned details; but the average “recoup” rate for a family-room addition is typically more than 80 percent.
The bottom line
While you should certainly research the existing-home marketplace before hiring an architect to map out the plans, building an addition onto your current home can be a great way to expand your living quarters, customize your home, and remain in the same neighborhood.
For more information on Windermere Evergreen and our agents, please contact us here.
Gardening Trends For 2018


Outdoor living during the spring and summer months is extremely popular. Months of cold, wet winters are followed by glorious spring colors and warm summer days of vivid blue skies. In this post, we thought that now would be the best time to share some pretty garden trends for 2018.
Wabi-Sabi

Leisure time should be just that: relaxing and rejuvenating. So why labor relentlessly to create and maintain a perfect landscape? Wabi-sabi, is the Japanese art of accepting transience and imperfect beauty. Relax and appreciate nature as it is, with humble imperfections, weeds and all. Recognize (and tell others) that dandelions and clover in untreated lawns are not blights. They are status symbols for ecological horticulture. Consider natural grasses and groundcovers as low-maintenance substitutes for sod. Opt for perennials instead of annuals, let flowers go to seed and give nature license to evolve on her own.
Reclaiming Small Outside Spaces

For many of us these days, space is at a premium and with house prices continually on the rise, more and more people are living in apartment blocks or tiny lots. Garden designers are determined to make even the smallest of spaces useful and attractive, and manufacturers have taken notice. Look for a better choice in planters that slot onto balcony rails. New models will have coverings for protecting plants from cold temperatures so that you can even grow seeds and vegetables on your balcony alongside your flowers.
Self-watering wall planter systems have been improved for 2018 and the hanging macramé plant holder is having a bit of a revival. Add a small patio heater and you have an outside space you can enjoy all year round with minimal effort.
Purple Passion

Pantone’s Ultra Violet is the color of the year. Maybe that’s why you find purple flowers in this year’s plant varieties and garden design. It’s easy to incorporate this color in the garden as there are many flowers and shrubs with this beautiful color. However, there are also several edible purple plants that you can grow. Purple vegetables are not only interesting and pretty, their unique color denote anthocyanins which are very beneficial to your health.
Re-Wilding

This is a style that keeps popping up time and again. However, 2018 has taken the re-wilding trend up another notch. It is still all about working with nature, growing wildflowers and supporting our pollinating insects. Re-wilding means adjusting plant selections to better support local wildlife and growing both seed-producing and berry-bearing plants. However, now it is also about using ‘green’ gardening products, natural solutions to bug and slug killers instead of chemicals and insecticides and using peat-free products.
Alfresco Living

Outdoor entertaining and kitchen areas are tipped to be a key trend for Spring/Summer 2018. We are not talking about a little nook corner just off the kitchen. Alfresco dining spaces are being pushed out into the garden itself and made into a major feature. These dedicated outdoor dining areas are surrounded by in-ground and container plants for that lush feeling. Special flooring, comfy furniture and mood lighting turn it into a little haven. Complete the trend with a sunken fire pit, barbecue or pizza oven and you might never want to leave.
Lighting The Way

Adding lighting to your garden is not a new thing. However, in this age of renewable energy, garden lighting companies are turning away from the more traditional lighting solutions we have seen in the past. The advances in solar energy capture, means that we can light up our gardens in a variety of fun, affordable and better ways. No more changing batteries or wiring up the garden with electricity.
The wide range of lighting methods allows you to create whatever ambiance you want. Simple stand-alone lights can mark pathways, either discreetly embedded into the path edges or standing loud and proud along the side. Multi-colored fairy lights can be tangled among the overhead branches of a tree creating dazzling shapes and textures. Solar Mason jars can be hung from above or used as table lighting. Festoon lights can create an ambient glow around any outdoor space creating romantic nooks.
For more information on Windermere Evergreen, please contact us here.
Spring in your step: smart ways to get rid of the clutter and update your décor

 Our bulbs went full bloom at my house a few weeks ago, which prompted the awakening of spring fever: mostly the urge to air out the house and get rid of clutter (again, didn’t we just do this?). In my desire to purge, I have been trying to find the best ways to get rid of things; to sell some items in order to reinvest in updated accessories, to support local charities, and just get rid of the junk in the most environmentally-friendly way possible. I am not as methodical as I’d like to be, but I am already seeing a difference with the reduced clutter. Here are some of my tips and favorite resources:
Office
Are you a piler or a stasher? We create stacks in our household, which we have to go through weekly, then move to our respective offices, where they wait (indeterminate lengths of time) to get filed. One of my first steps in clearing out the junk was to deal with the piles of paper. I shredded anything that should be shredded and recycled and filed the rest. If you are supremely organized, I suggest taking this time to note what bills you actually get paper invoices for, and move towards electronic billing. Also, if you haven’t already, take a moment to stop your junk mail, saving yourself a step in the filing process and reducing some paper use.
I finally went through the stack of magazines piling up next to the bed, tearing out any recipes, articles and ideas I wanted to reference later, and throwing the rest away. If you are looking for an electronic alternative to the magazine clutter, read your magazines online and save your favorite articles with a social bookmarking tool such as delicious.com to easily search your saved files with your own key words.
If there is a bookcase in our house, it will be filled so, instead of investing in ANOTHER bookshelf, I decided to make space for all the books I will likely buy this year by getting rid of books I probably won’t read. We will be reselling some books to amazon.com while others will either go to the local used bookstore for store credit or be donated to a local charity.
You can also gain a lot of space by going through your media. If you still have DVDs and CDs, inventory them and decide if you can move to a digital archive. It may take some time, but downloading and backing up your media could make you more organized in the long run and eliminate unnecessary clutter. Get rid of the disks once these have been backed up, reclaiming that shelf space.
As more and more of our lives are kept in digital files, it is important to take precautions to protect our files as well as the hardware that stores them. If you store important documents, family photos, media, or other items on your hard drive, make sure you have a backup plan. Learn more about digital storage options so if anything happens to your hardware you don’t lose everything.
Garage/ Basement
Whenever I go to the hardware store, I must suffer from temporary memory loss; what else would explain the multiples we acquire? This year we are doing an audit. If we have enough stuff to justify it, we will do a garage sale, but most likely we will sell what we can on craigslist or eBay and give away the rest on freecycle.org. These are all great options for ridding yourself of unwanted, outdated and duplicate items. We also have a pile of electronics to get rid of: an old microwave, tv, toaster oven, printers, juicer, etc. We don’t want to dump these if they can be recycled. We are looking into e-cycle options in our area, including local Windermere offices holding e-cycle events regularly, which also benefit the Foundation.
The same rules apply to our excess storage.
As you de-clutter and reorganize, make updates to your home inventory list. Spring is a great time to make sure your list of household items is up-to-date for insurance purposes. It is also a good time to check on your major appliances to determine if your furnace/water tank/septic or other major systems need to be serviced.
Closets
As the seasons change, it is a good idea to go through your clothes in order to renew and refresh your wardrobe. If you have items that can be updated with a few alterations, make a plan to spend some time with your tailor. Otherwise, look critically at the clothes you have. If you didn’t wear it in the last year and it cannot be altered to work with the rest of your wardrobe, consider donating it to Goodwill or your preferred charity. Throw any soiled or damaged clothes away. Spring is also a great time to get rid of any old linens and towels that have seen better days.
Furniture
You will likely be surprised by how light your load is once you have really gotten into the de-cluttering process. If you have furniture you don’t use or that doesn’t fit with your décor, consider your options. You may be able to repurpose your furniturefor more efficient use, such as a console table as a landing strip next to the door, an armoire for playroom storage, or even old doors as a headboard. Or you may breathe new life into your furniture by painting or re-staining. If you can’t repurpose, why not recycle? You can donate your furniture, sell it on craigslist or give it away on freecycle.org. Getting rid of excess furniture can revitalize a room almost as much as buying new furniture.
Spring Forward
Once you have cleared the clutter and made way for a fresh perspective, figure out what will help keep the clutter at bay, and add design elements that inspire you. Decorative baskets keep magazines in order; decorative vases with flowers add natural elements help keep the indoors fresh; and new lighting or a new paint color can brighten up a room in an instant. Subtle updates in your rooms can make all the difference once the clutter is gone.
What are your tips for preparing for spring? What are your favorite spring rituals, once the cleaning is done?
For more information on Windermere Evergreen, please contact us here.
