
 Facebook
 X
X
 Pinterest
 Copy Link
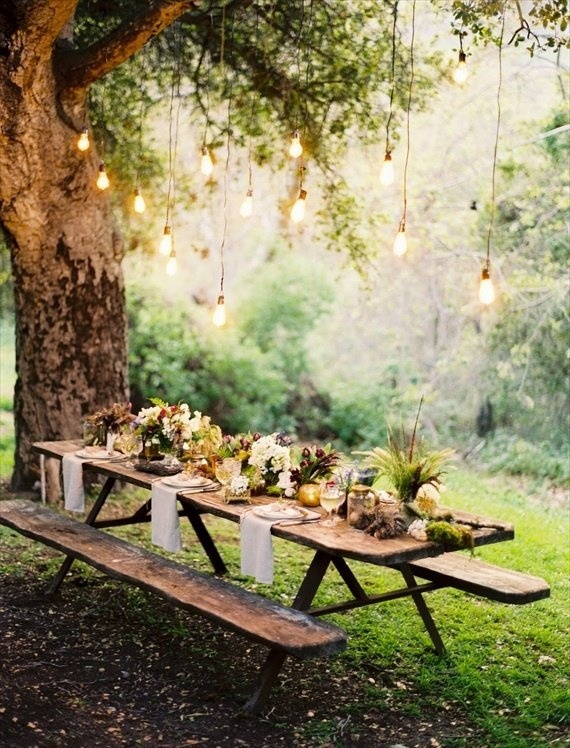
Take it outside!

 Dust off your grill and get ready, it is the kick-off to barbecue season! Hopefully your summer is on its way to a good start and the weather is cooperating. The 4th of July always feels like the official start to the summer for me (perhaps because Seattle doesn’t usually get too sunny and warm until after the holiday). Now that the sun is shining and the air is warm it is time to spend more time outside.
Extending your living space to the outdoors is nice for relaxing and entertaining. Here are some quick ideas to make your backyard patio more comfortable all summer long.
Grounds
Take a look at your surroundings and make some little changes that will make your outdoor time more enjoyable. Some easy updates for your backyard can be functional, like setting your sprinkler on a timer, so technology can water your yard and you can spend more time relaxing. Or find aesthetically pleasing replacements for necessary items like your hose storage. Other improvement can help transform your space into a sanctuary, like planting flowers to attract hummingbirds and butterflies.
Furniture
The best outdoor furniture looks nice, feels comfortable, withstands the elements and is easy to store once the weather turns. You should consider how you plan to use your space: for lounging and reading a book, playing with the kids, entertaining, or all of the above. Treat outdoor spaces as an extension of your living room or dining room. Pick items that reflect your taste and serve your needs. If you grill a lot, extend your kitchen prep outside with tools and a surface ready at a moment’s notice. Or find a neat bar cart to have drinks accessible for your parties.
Lighting
Make sure you can enjoy your space after the sun goes down with the right lighting solutions. Candles are nice, but they can be a hazard if someone knocks them over or you forget them after you go indoors. Consider the mood you want to set and what you need to adequately light pathways and stairs. There are many options ranging from homemade to high-end and solarto electric.
Entertaining
Keep your entertaining supplies ready for impromptu gatherings with outdoor furniture that doubles as storage space. That way you don’t have to go searching for plastic table wear every time. Same goes with outdoor toys and games; use a closed plastic bin to store croquette sets, inflatable pool mats, and other fun gear. Another fun idea is setting up your own outdoor theater for late night showings and double features.
These are just a few of the ideas I’ve considered for upgrading an outdoor living space. How do you make the most of your outdoor space during the summer?
For more information on Windermere Evergreen, please contact us here.
Make the Most of the Home You Have

If you have been in your home for a while you may be restless for change. The great part about having a home of your own is you can make improvements and give your home a chance to evolve over time. You just need to help your home live up to its potential! Here is a top ten list of improvements that will help you make the most of your home.
- Find your home’s purpose. Each home is as unique as its owners, so in order to fully utilize your home, consider how you view your home’s purpose. Some people like to entertain, others find it a calm space in the frenzy of daily life; some nurture their families and others nurture their creativity. Your home’s purpose can be any combination of these and more, but it helps to consider the function of your space in order to ultimately find its purpose.
- Assemble a list. A list always helps me figure out where to start or prioritize what is the most important project. Think about what you want to change in your home, inspirations, and preferences. .
- Make an “inspiration board”. An “inspiration board” is a great way to visualize your home’s decor. You can create a board online with a tool like Pinterest to organize ideas you love or you can do it the old fashioned way with a board, magazine cutouts, color swatches, and fabric samples. Doing this will allow you to see all the elements you like in one place so that you can then tie it all together into a room you love.
-
- Create a collection. If you have items that you like to collect, think about how to transform that collection into something you can display. If you don’t already have a collection of loved objects think about what this collection would be for you. You can center a room design around your travel souvenirs, old camera collection, figurines, unique plates, or familial objects. Adding to this collection over time can be a great way to keep your spaces new while maintaining a personal feel to your decor.
- Choose a new palate. Shake up your sensibilities and think of a color that will compliment your room while making a statement. It’s easy to fall into the white/beige standby to keep our rooms neutral, but sometimes a color that provides a contrast to your décor will make the room pop.
- Re purpose an old piece of furniture. Instead of replacing your furniture give it a facelift. You can have a sofa or chairs reupholstered or make use of a slip cover. Also, Painting and staining can add new life to your wood pieces.
- Rearrange. Moving furniture around is another easy way to reinvent your space. Try placing your sofa on an angle to open up your entertaining room or move your lamps to improve lighting. You can also think about moving a piece of furniture into a room to give it new life, like using a unique dresser for a credenza or a chair as a side table.
- Make a room of your own. Find some space in your home that is uniquely yours, whether this is the corner of the guest room or an office of your own. It can be very rewarding to have a space that you can organize to fit your personal needs without the worries of others intruding
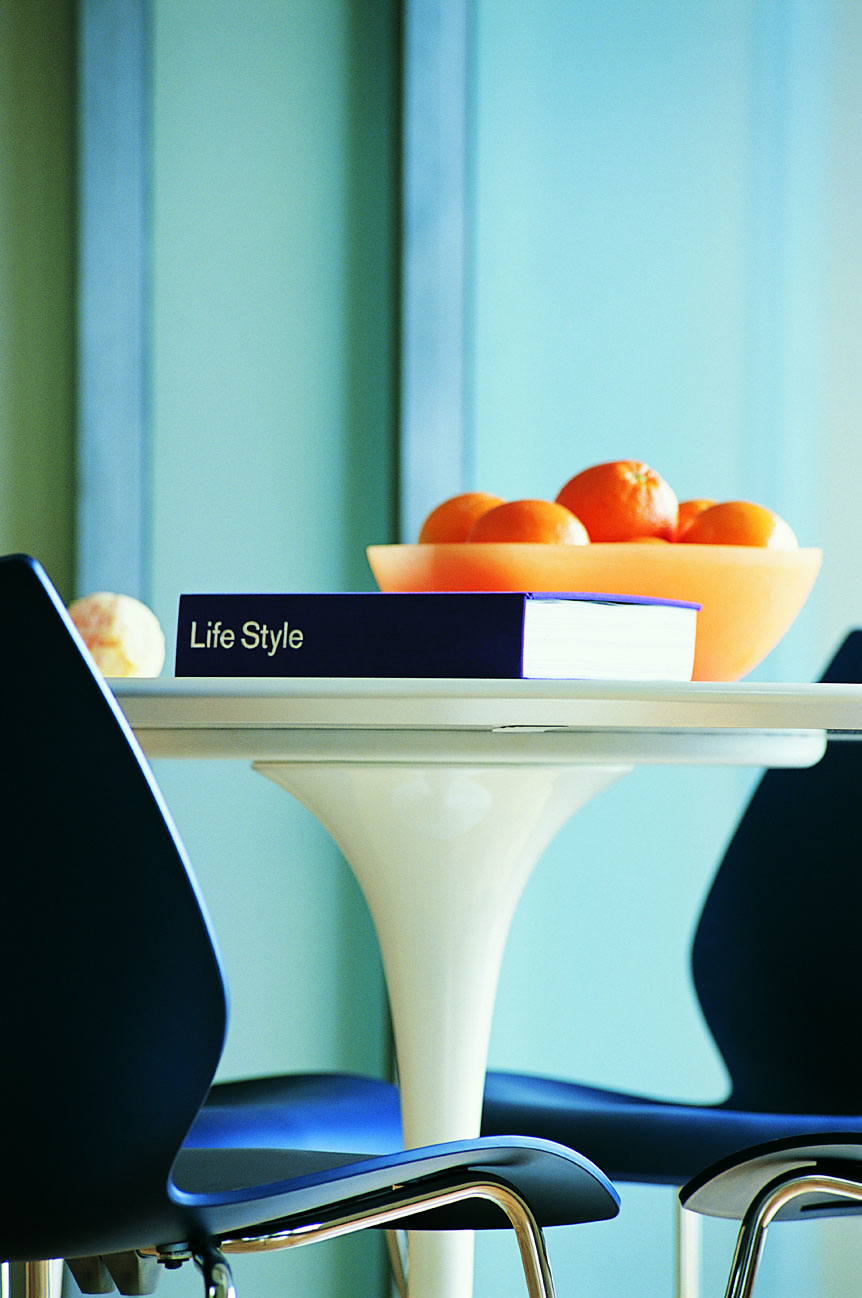
- Find an inspirational object. Have you ever fallen in love with an object that inspired you to want to completely redo a room to accommodate it? Designing a room around an inspiring object can be a great way to create a space that truly embodies your design sensibility.
- Find design motivation. Home design evolves over time and can be sustained by finding items that inspire you. Read magazines and books that inspire your interests in architecture, design, art, etc. Or find stores and flea markets that sell pieces that influence your aesthetic. Or bring a camera with you when you’re doing your favorite activities and bring back memories or inspirations. Most of all have fun!
What inspires your home design?
For more information on Windermere Evergreen, please contact us here.
How to Save Energy in your Home


With the increased emphasis on global warming in recent years, combined with rising energy costs, more and more people are asking what they can do to make their homes more energy efficient. Energy conservation can be as simple as closing your curtains at night, changing a light bulb, turning down your thermostat, or closing the fireplace damper. Many of the most inexpensive solutions quickly pay for themselves in conservation, which you ultimately benefit from when you get your power bill.
One of the biggest ways you can conserve energy is to take advantage of “off-peak” hours. This is a step that everyone can take because it simply involves shifting your power use of major appliances, such as washing machines, dryers, and dishwashers. Puget Sound Energy recommends using these appliances outside of peak hours—peak hours are between 6am-10am and 5pm-9pm. Studies show that by shifting a portion of your energy use, consumers can significantly lower wholesale electricity prices, which saves everyone money in the long run.
Another way you can save energy is by washing your clothes in cold water and only running full loads. When using the dryer, toss in a couple of dry towels with your clothes to help speed up the drying process. It’s also important to clean the lint trap in your dryer after every load and make sure the dryer hose and vent are clear.
There are several steps you can follow to reduce your home’s demand on heating during the winter months. Conventional measures, such as setting back your thermostat, are effective at reducing energy consumption. It is recommended that you keep your thermostat set between 65 and 72 degrees during the winter months. Keep in mind that by simply lowering your thermostat one degree, your furnace will use seven percent less energy overall. It’s also important to clean your furnace filter frequently—doing so will enable your heating system to run more efficiently and cost-effectively.
It’s estimated that lighting accounts for 10 percent of your overall home energy bill, so another way you can conserve is by using energy-saving fluorescent light bulbs, known as CFL light bulbs. CFLs use approximately one-quarter of the energy of equivalent incandescent bulbs, they give off warm, indirect light, and they last ten times longer than average light bulbs. When shopping for CFLs, look for those with the Energy Star label on them—this ensures that you’re purchasing a product that has been approved by the U.S. Environmental Protection Agency (EPA) and the U.S. Department of Energy (DOE).
For more information about energy conservation, please visit www.energystar.org.
For more information on Windermere Evergreen, please contact us here.
Summer Entertaining Guide
Summer will be here before we know it, and the season is ripe with opportunities for parties, barbecues, and outdoor entertaining with friends and family. To set the stage for fun gatherings, we have collected some ideas for outdoor decorating, fun party themes, and more on the “Summer Entertaining” Pinterest board. What are your tips for throwing a fantastic summer soiree?
Outdoor improvement
Add some finishing touches to your outdoor spaces to create a fun atmosphere and a touch of your personal style.

Party ideas
You don’t need an excuse for a party! Elevate your gatherings to a whole new level with these fun party ideas.

Get your game on
From Bocce to Horse Shoes, there are plenty of games for guests of all ages.

Summer safety
Keep your friends and family safe outdoors with this quick tip.

How to feed a crowd
Don’t forget to search for delicious recipes, quick BBQ tips, kid-friendly foods, and summery cocktails.

You can find more fun home decoration and entertaining ideas on the Windermere Pinterest Board.
For more information on Windermere Evergreen, please contact us here.
5 Creative Ways to Dress Up a Ceiling

A crisp white ceiling is a classic look, but it’s not the only option for making a room look polished. Here are a few other design considerations to bring some personality to your ceiling.
The sky is the limit when it comes to the amount of creativity and beautiful layering you can put into creating a decorative statement on the ceiling. But before we discuss the many stylish or unusual treatments to consider, let’s start with a classic finish you’ve probably seen before.
Ceiling 1: Toronto Interior Design Group | Yanic Simard, original photo on Houzz
Exposed Concrete
In my own design projects, I find many clients are excited to remove a popcorn ceiling treatment, and this is usually my preference as well. The results can be subtle, yet striking.
In some cases, the results can be dramatic. Removing a popcorn ceiling, and the entire drywall layer above, can often reveal architectural finishes, such as a cool concrete surface.
An exposed concrete ceiling gives a room a bit of industrial, architectural flair, adding drama and texture in a modern way. Of course, not every home has a concrete ceiling to reveal, so it’s important to speak with your designer or contractor before making any plans.
It’s also important to note that stripping a ceiling back to the concrete will leave no space for recessed ceiling lights. For this reason I usually include an area of dropped ceiling to allow potlights, define a gathering space or focal point and visually break up the look a bit.

Ceiling 2: Victoria Gerts, original photo on Houzz
Flat Drywall
From my experience, the most popular contemporary ceiling style is the simple flat drywall ceiling. If a room includes other sound-absorbing materials like rugs, curtains or a fabric headboard, you can skip the acoustic ceiling treatment without worrying about echoes.
As I mentioned before, it is not always easy to achieve a perfectly crisp drywall ceiling, but skilled tradespeople can install either a new drywall ceiling or scrape the texture paint from an existing ceiling to reveal a much more sleek, modern surface.
Trimming a ceiling with crown molding painted to match the ceiling hue is a great alternative way to hide subtle imperfections in the slope of the ceiling and achieve a bright, airy, classic look.

Ceiling 3: Jade N Timmerman Interiors, original photo on Houzz
Paint
A drywall ceiling doesn’t only come in one shade, so while we’re discussing this finish, let’s touch on some differing paint choices.
White. A white or just-off-white ceiling is popular because it’s a great way to make any room feel open and airy and let light bounce from any windows or light fixtures back into the room.
For a contemporary or modern home, plain white can work great, but for a more traditional home or a space with definite warm tones (like this room with a lot of welcoming beige), choose a subtle off-white that complements the tone of the walls.
For a fun, trendy take, cheat the ceiling line a bit by starting the ceiling paint 12 to 24 inches down the wall (or only painting the walls up to that point, whichever way you think of it). The result is a breezy modern effect without using any bold hues or new materials.
Gray. Using a darker hue on the ceiling than on the walls visually brings the ceiling down, which can make a room feel more intimate.
Using a neutral gray shade (or one with a hint of cool blue) achieves this effect without drawing too much attention, so the room still feels serene and sophisticated.
This makes gray a great choice for bedrooms, dens and nurseries, bringing a peaceful, cozy atmosphere.
Accent colors. For a room with a unique personality, adding an accent color to the ceiling infuses a lot of drama in an unexpected spot.
I won’t lie: As a DIY task, painting the ceiling is not nearly as easy as painting a wall, and even for professionals it usually requires the room be fully emptied first. So, it’s best to be absolutely sure that you love a hue before applying it to the “fifth wall.” The upside is that the ceiling is often a relatively small surface area, meaning that splash of color is a more controlled dose than painting the walls.
While a painted ceiling is immediately noticeable in a room with stark white walls, when a room has a lot of interesting and eclectic finishes on other surfaces, a rich hue can actually blend in better than a white ceiling. It’s a daring look for sure, but for those who love a lot of personality in their home, a colorful ceiling can be a very livable choice.
For the best of both worlds, a navy, deep teal or royal blue shade will feel dramatic but still appear neutral enough to not overwhelm you.
Matching ceilings and walls. Painting the ceiling to match the walls may sound overwhelming, but sometimes it can actually be the more subtle choice. When the ceiling and the walls (or even just a few walls) are the same hue, the lack of contrast makes the ceiling less of a dramatic feature and more of a singular background color. Of course, this applies best to softer hues like gentle pink, watery blue or heritage butter yellow.

Ceiling 4: Toronto Interior Design Group | Yanic Simard, original photo on Houzz
I personally match the ceiling to the walls quite often when using light neutral shades. While it may appear white on your screen, the walls, ceiling and molding in this project are all Benjamin Moore’s Classic Gray, a subtle, warm gray shade. In an older home, using an all-over hue is a great way to deemphasize imperfections such as sloped ceilings that don’t meet walls in a perfectly straight line.
Two-tone paint. Using a dark or dramatic paint color on the ceiling doesn’t have to be an all-or-nothing decision. Like the opposite of an area rug, painting just part of a ceiling can help define a particular zone. Lining up the edge or edges with another element in the room will help it make visual sense.
Paint Finishes
Semigloss. The higher the degree of gloss in a paint, the more visual depth it will have and the lighter the perceived color will be. So, when choosing a darker shade especially, selecting a semigloss or more subtle satin finish can make a color seem less aggressive and more multidimensional and help keep the paint from absorbing all of the light in the room.
Matte. Matte and eggshell finishes represent the less-glossy end of the spectrum, and thus reflect less light. This will make a color seem more pure and vivid, and a bit darker. For those who don’t want to shy away from a rich statement, a matte finish gives a crisp contemporary look.
Gloss. Ultra-high-gloss paint is not easy to apply to a ceiling because it has a slower drying time and thus lots of opportunity to drip or become uneven. But it’s not impossible for expert professionals, and the results can be stunning, especially when paired with sparkling ceiling fixtures and beautiful natural light.
Alternately, a “stretched ceiling” uses a layer of high-tech material suspended just below the true ceiling to create a gloss effect (or other finishes) that paint alone cannot achieve.

Ceiling 5: Legacy Custom Homes Inc, original photo on Houzz
Paneling
Wood planks are most often seen on the floor, but they look just as beautiful above.
While wood-paneled ceilings are often associated with cottages and farmhouses, they can work with a variety of styles of home. Panelling works well for transitional homes, especially in controlled doses like the small strip seen here, bringing texture and richness to the ceiling that a solid color can’t match.
Generally, thinner strips of wood, and species with more knots, will appear more cottage-inspired, while wider planks or sheets, often with a less-grainy finish, will carry a more modern appearance.
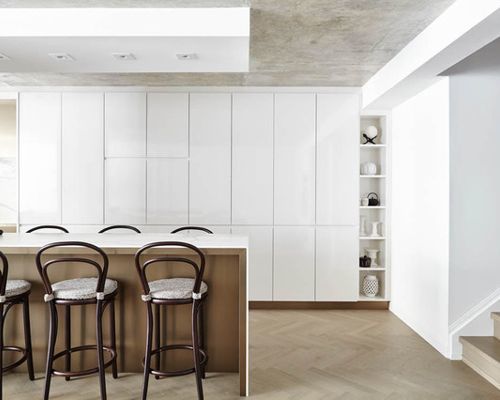
Both types work well in kitchens with airy white or off-white cabinetry, taking a classic “white kitchen” and giving it added warmth and a natural appeal.

Ceiling 6: Buchanan Construction, original photo on Houzz
Pressed Tin
While these panels are not necessarily made from tin, the pressed-tin look endures as a charming option for traditional kitchens, or contemporary or transitional kitchens that want to add some classic flair.
These panels can be visually quite dominant with their glam or antiqued finishes and busy patterning, so they work well in rooms with otherwise simple palettes, or as a small accent over an island or seating group.
To keep the look fresh and bright, try using classic tin panels with stainless steel appliances, so the primary metal tone repeats and the room feels cohesive.
For more information on Windermere Real Estate and our agents, please contact us here.
Baby Boomers Have Homebuilders Rethinking Home Design

 The baby boomer generation, which is currently estimated to be aged between 48 and 67 years old, comprises almost one-third of the nation’s population. The demand that this lucrative segment of the population has on housing is causing homebuilders to rethink how they design homes. In fact, the National Association of Home Builders (NAHB) has a 50+ Housing Council which focuses entirely on the housing needs of aging baby boomers. A study commissioned by the NAHB suggests that baby boomers and older homebuyers want a maintenance-free lifestyle that frees them up to travel, socialize, and pursue other activities. Perhaps this is why real estate professionals report an increase in the number of baby boomers who are interested in condominiums and townhomes. There is also growing popularity for luxury units because they appeal to empty-nester baby boomers who no longer want the maintenance of a single family home, but don’t want to scale back on certain features and amenities either.
Oh My Aching Back: Cabinet Heights to the Rescue

 When approaching a kitchen or bath remodel or new construction, you can make things a lot more comfortable by getting creative with the heights of your base cabinets.
Standard heights traditionally have been 36” tall (including the thickness of the countertop material) for kitchen base cabinets, and 29” – 30” tall for bathrooms. These heights are good overall, but are surely not set in stone and can make life a lot more comfortable with some tweaking.
Consider the users’ heights when deciding on cabinet heights. If everyone in the household is tall, consider having the main area of the kitchen raised an inch or so. Chopping will be much more comfortable that way, and it will help avoid arm and back fatigue. If household members are various heights, consider having one area raised higher and another area at the standard height. If you have someone who requires lower heights, such as a wheelchair user, consult a design professional to assist with their particular needs.
In the bathroom areas, consider the primary users when determining the best heights. The master bath would likely serve adults, so having the base vanities at a taller 34” height will help to avoid stress on the users’ backs when utilizing the sink for face washing and tooth brushing. If a child uses the area, keep a small step stool handy for those times. A main hall bath outside the children’s rooms could have the standard height. If the children are a bit older (and taller) and you intend to remain in the home longer than a few years, consider the taller height there too for when the children are taller, as they do grow quickly!
Just a few adjustments can make for happy backs, and aren’t difficult at all to achieve if you plan ahead. For more information on Windermere Evergreen, please contact us here.
Windermere Evergreen’s Grand Opening


Windermere Evergreen held it’s Grand Opening on Friday, February 16th. It was a great event and we were joined by many close friends, co-workers and family. Evergreen Chamber of Commerce was at the event, for a ribbon cutting ceremony. Inspired fitness our new neighbors in the building, joined us as well in celebrating their Grand Opening at the same time. It was a successful event and we are very excited to be “officially” open for all of your Real Estate needs! Thank you everyone for coming out to celebrate with us!
How to Style Your Bookshelf

Whether you have a library full of books or only hold onto a few favorites, a bookshelf is one of those furniture pieces most homes are guaranteed to have, and yet, few have them are properly “styled”. We have some easy DIY tips that will transform your shelves, while still allowing your books to stay center stage.
Start with a blank canvas. Take everything off your shelves before you decide to start putting your books back on.
Mix it up. Don’t have all of the books vertical or horizontal (but never stack anything on top of vertical stacks). Layer them on top of each other in different ways on all of the various shelves. Bigger books on bottom of stacks, smaller ones on top. Place your most attractive books at eye level.
Accessorize. Add items in between, in front, and on top of books. This can mean collectibles, candles, small plants, pictures, you name it. You can use a variety of shapes and sizes, but try to keep all non-book items to the same theme/color.
Leave Space. Adding just a little bit of space between items gives space for the eye to breathe and helps your book and collectibles to stand out.
Little details. Don’t follow the same pattern on each shelf otherwise it could end up looking too stiff. Try to zig-zag your way down (or up).
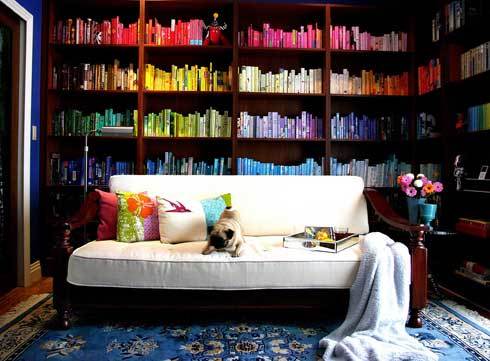
Add color. If you’re ready for a full-fledged redo, paint the back of the bookshelves to add dimension and character before styling. If you don’t want to permanently color your bookcases, try fabric or wallpaper. For example, if you have glossy accessories, choose a metallic wallpaper to turn your bookshelf into a shimmering showpiece.
Have too many books or don’t feel like accessorizing? No problem. Color code your books ROYGBIV style to make a bold and fun statement in your room.
For more information on Windermere Evergreen, please contact us here.
8 Laundry Room Updates to Fit Any Budget
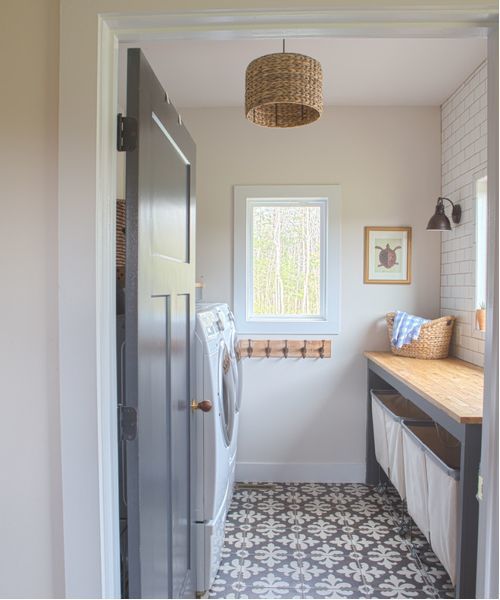

Laundry 1: Sharon Barrett Interiors, original photo on Houzz
Hoping to transform your tired laundry room into a sparkling clean, efficiently working space, but without the major costs of a full remodel? By not changing the layout or adding square feet, you can bring costs down while still making meaningful changes to your space. Use this guide to help you decide what to prioritize and what to put on the back burner, and give your laundry room an update that works with your space — whether your budget is $100 or $10,000.
If your budget is about $100: Clean, declutter and upgrade laundry baskets that have seen better days. It’s worth spending a little more for hampers that can stand up to heavy use.
Also think about which features would be most helpful to have, such as hampers on wheels, triple-sorter bins or stackable baskets that can tuck out of the way when you’re not using them.
If your budget is about $300: Clean up, get hampers and then give the walls a fresh coat of paint. A cheerful color can make your laundry room feel brand-new without breaking the budget — especially if you’re willing to DIY.
If your budget is about $500: Get hampers, fresh paint and then a soft new rug. You’ll appreciate the dose of color as much as the softness underfoot. If moisture is a concern (for example, if your laundry room is in the basement), you may want to choose a sturdy indoor-outdoor rug.
If your budget is about $700: Get hampers, fresh paint and a new rug, and then swap out the lighting.
Ample lighting is important when you’re trying to check laundry for stains and read labels, so pay attention to the recommended wattage of any light fixture you are considering — anything less than 75 watts may not shed enough light (especially if it’s the sole light source in the room).
If your budget is about $1,200: Tackle all the above, and then treat your space to some bonus storage and extras, like an ironing station, a drying rack or open shelves. If your laundry room is small, look for space-saving designs like folding drying racks, retractable clotheslines and wall-mounted ironing boards.
If your budget is about $3,500: What’s next? New appliances! A new washer and dryer can work more efficiently than older models, operate more quietly and get your clothes cleaner.
If you’re going from top-loading to front-loading machines, consider adding a countertop above to hold supplies and act as a surface for folding. Not in the market for a new set? Give your old machines a thorough cleaning to keep them running well (and smelling fresh).
If your budget is about $5,000: If you have more room in the budget, think about replacing the laundry room sink and faucet. If you’re hoping to avoid additional installation costs, choose a new model that is the same size as the old one. If you don’t already have a sink in the laundry room, adding one will require more extensive help from a plumber, and costs will be significantly more.
If your budget is about $10,000: So you have the hampers, paint, rug, lighting, storage, appliances and sink. If you still have room in the budget, think about tackling a bigger project like installing a new tile floor or a pet-washing station. Your furry friend may not thank you but sure will look cute sitting in that tub.
For more information on Windermere Evergreen, please contact us here.
