
 Facebook
 Twitter
 Pinterest
 Copy Link
10 Costs Associated with Selling Your Home


Selling a home is an exciting time for homeowners. Once you and your household have decided that you’ll hit the market, it’s easy to think solely about the revenue that comes with the sale. However, selling a home comes with its own set of costs. Knowing what these costs are will help you budget throughout the selling process.
Here are 10 most of the most common costs that come with selling a home:
1. Commission fees
Of all the expenses that come with the sale of a home, agent commission fees are usually the largest and for good reason. Real estate agents are professionals, wielding their industry knowledge and local expertise to get the job done and save countless hours of work for the homeowner. The commission is split by the agents representing both buyer and seller, typically totaling between five and six percent of the sale price.
2. Pre-sale home inspection
Pre-sale home inspections are not mandatory, however, if a seller does not conduct one, it could lead to major costs down the road. The inspection allows the seller to find any issues with the home and properly disclose them to the buyer. If the buyer’s home inspector finds repairs that need to be made, they can ask the seller for a price reduction or require that they be fixed in order for the sale to go through.
3. Home repairs
There are varying degrees of home repairs that can increase the value of your home. Cosmetic fixes like improving your landscaping will do wonders for your curb appeal. Painting and decluttering help to present the home in the best light for buyers. Larger projects like replacing appliances, roofing, plumbing, and full-scale upgrades are a more significant investment but can increase your home’s value.
4. Staging costs
During the selling process, it pays to put effort into the presentation of your home. Staging helps buyers to visualize living in the home. Professional stagers will enhance your home’s qualities while minimizing its deficiencies. Their cost will depend on the level of staging your home requires.
5. Utilities
In the interim period between when you move out and the buyers move in, you’ll want to continue paying utilities. Without running water, electricity, and heat, your home could be difficult to show to buyers.
6. Remaining mortgage
Another cost of selling your home is the remaining loan balance on your mortgage. If you have been steadily paying your mortgage, your home sale will greatly aid in paying back the remaining amount, if not cover it completely.
7. Escrow fees
In a home sale, there’s always the question: Who handles the cash? That’s where escrow comes in. It’s common for buyers and sellers to split the cost of escrow services. Be mindful of additional costs during escrow such as transfer fees and notary services.
8. Capital gains tax
The capital gains tax is assessed by taking the difference between what you paid for your house and what you sold it for. There are common exclusions for the tax, but there are situations where the exclusions may not apply. For example, if the home was not your primary residence, you could end up paying taxes on the whole gain. Talk to your Windermere agent for more information.
9. Property tax
If your home sale takes place after you’ve paid taxes for the year, you may get a rebate at closing. In this case, the buyer reimburses the seller for the applicable taxes paid. Otherwise, the seller should pay the prorated share of property tax until the sale closes, placing the money in escrow.
10. Moving costs
Finally, the home sale is final, and you’re ready to move. Whether you’re moving locally or across the country, moving costs can add up quickly. Moving as many of your items yourself can save money, but for larger, more difficult to transport items, you’ll likely need to incur the cost of hiring professional movers to ensure your items arrive at your new home safely.
These are just some of the costs associated with selling your home. Each home sale is different, and the costs vary accordingly. Knowing what you can expect to spend throughout the selling process will help you budget accordingly.
What ‘s My Home Worth? The Downside to Home Valuation Tools

It is a seemingly simple question. However, discovering the worth of your home is more complicated than it might seem. Sites like Zillow, Redfin, Eppraisal, and others have built-in home valuation tools that make it seem easy, but how accurate are they? And if you get three different answers, which one do you believe? Online valuation tools have become a pivotal part of the home buying and selling process, but they’ve proven to be highly unreliable in certain instances. What these valuation tools have made clear is that real estate agents are as vital to the process of pricing a home as they ever were—and maybe even more so now.
Every online valuation tool has its limitations. Most are readily acknowledged by their providers, such as “Zestimate” from Zillow, which clearly states that it offers a median error rate of 4.5%. That may not sound like a lot, but keep in mind that 4.5% amounts to a difference of about $31,500 for a $700,000 home. For Redfin and Trulia, there are similar variances. When you dig deeper into these valuation tools, it’s no wonder that there are discrepancies. They rely on a range of different sources for information, some more reliable than others.
Redfin’s tool pulls information directly from multiple listing services (MLSs) across the country. Others negotiate limited data sharing deals with those same services, relying on public and homeowners’ records alike. This can lead to gaps in coverage. These tools can serve as helpful pieces of the puzzle when buying or selling a home, but the acknowledged error rate is a reminder of how dangerous a heavy reliance on them can be.
Nothing compares to the level of detail and knowledge a professional real estate agent offers when pricing a home. An algorithm can’t possibly know about the unique characteristics of neither a home nor its neighborhood. Curious about what improvements you can make to get top dollar or how buyer behaviors are shaping the market? They cannot provide an answer there, either. That can only be delivered by a trusted professional whose number one priority is getting you the best price in a time frame that meets your needs.
If you’re curious about your home’s value, Windermere offers a tool that provides a series of evaluations on your property and the surrounding market. And once you’re ready, we’re happy to connect you with a Windermere agent who can clarify this information and perform a Comparative Market Analysis to get an even more accurate estimate of what your home could fetch in today’s market.
10 Tips to Minimize Stress When Selling Your Home


When I was growing up, my family must have moved a dozen times. After the first few moves, we had it down to a science: timed out, scheduled, down to the last box. Despite our best efforts, plans would change, move-out and move-in days would shift, and the experience would stress the entire family out. Despite the stress, we always managed to settle in our new home and sell our old one before the start of school.
With a lot of planning and scheduling, you can minimize the stress of selling your house and moving. Here are some tips:
Plan Ahead
Know when you want to be moved out and into your new home and have a backup plan in case it falls through. Before you sell your home, familiarize yourself with local and state laws about selling a home so you’re not caught by surprise if you forget something important.
Lists and schedules are going to be your new best friend through the process. Have a timetable for when you want to sell your house when you have appraisers, realtors, movers, etc. over. Also, keep one for when your things need to be packed and when you need to be moved into the new place. I suggest keeping it on an Excel sheet so you can easily update it as the timeline changes (and it will – stuff happens).
Use Resources
First time selling a house? Check out some great resources on what you need to know. US News has excellent, step-by-step guides on what you need to know to sell. Appraisers and realtors can also be good resources, and since you’ll be working with them through the process, be sure to ask them questions or have them point you to resources.
Appraisal
Have your house appraised before you sell so you know your budget for your new home. This will help you look for an affordable home that meets your family’s needs. It will also help you maximize the amount you can receive for your old home. You can also learn useful information from an appraisal, such as which repairs need to be made, if any.
Repairs
Does your house need repairs before you move? If so, figure out whether you’ll be covering them, or whether your buyers will (this will be a part of price negotiations, so factor it in with your home budget). Will you need to make repairs in your new house, or will that be covered? Either way, make sure you know which repairs need to be made – and either be upfront with buyers about them or make them before you sell.
Prepare to Move
If you’re moving to a new town or a new state, you need to prepare more than just a new home. Research doctors and dentists, places to eat, and what to do for fun. If you have school-aged children, look at the local school district or private school options – not only to learn how to enroll your kids, but also to get a feel for the school culture, see what extracurricular activities your kids can do, what standards/learning methods your kids’ new school will implement, etc.
Packing
Think: how soon are you moving, what will you need to use before you move, what can get boxed and what needs to stay out? The sooner you’re moving out, the sooner you need to pack, but if you have time, just take a day per weekend to organize a room, pack what you want to take and arrange to donate what you want to get rid of.
Downsizing
Moves are a great time to purge old, unwanted and unused stuff from your home. Sometimes, it’s necessary if you’re moving into a smaller space. Either way, as you pack each room, think about whether you use what you’re packing to take with you. If you do, pack it to go. If not, put it in a separate box to go to your local donations place. You can also call some organizations to have your unwanted things picked up, no hassle.
If You Have Kids
Moving with kids can be extra stressful. Be sure to include them in the process. This is a wonderful opportunity to teach younger children about moving and prepare them for the changes it brings. Older children can help out with responsibilities, like packing their room or researching their new town.
Your New Place
Moving into a new place takes some planning as well. Once you’ve bought your new home or condo, design at least a basic outline for where your stuff will be set up. Make necessary repairs and decorate (painting, for example) before you unpack. Ideally, you should have some time to do these things before, but if you don’t, don’t be in a hurry to unpack everything – it can be a hassle to paint if you have all your furniture and bookshelves up!
Staying In Touch and Making New Friends
Finally, moving can mean good-byes with family and/or friends. Social media is a great way to keep in touch with people after you’ve moved, but distance can still weaken these old relationships. Make some time to call or message your old friends to keep in touch. Pair that work with a concerted effort to meet new people. See what hobbies or groups are in your new area and start there. It doesn’t seem like a lot, but it can make your new house a home and make your new town a community you can enjoy.
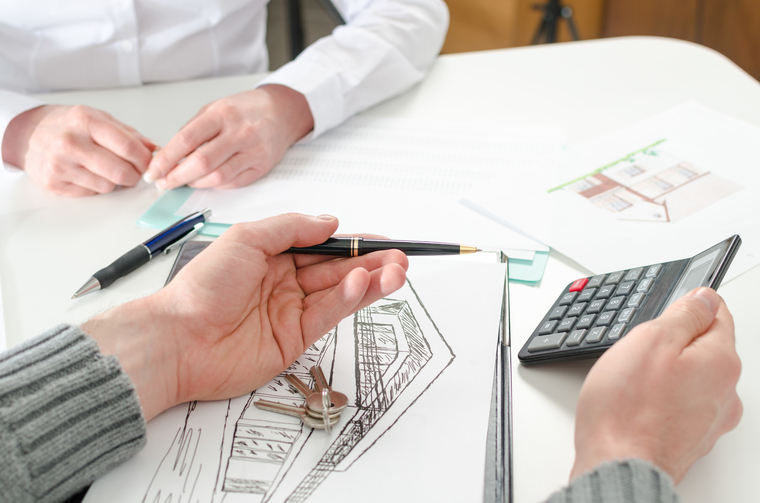
Selling your home: A step-by-step approach


Whether you’re starting a family, moving for your job, getting ready to retire or embarking on a new chapter in your life, when your home no longer suits your current situation, it’s time to think about selling it. Although this can be a bit complicated, with the help of your agent, you can minimize the hassles, get the best possible price, and shorten the distance between “For Sale” and “Sold”.
Price it right
If you want to get the best possible price for your home and minimize the time it stays on market, you need to price it correctly from the beginning. Your agent can give you a clear picture of your particular market and can provide you with a comparative market analysis (CMA). A CMA contains detailed information on comparable homes in your area, including square footage, date built, number of bedrooms, lot size and more. It lists pending sales and houses sold in your area in the past six months, along with their actual sale prices.
By comparing your home to similar homes in your neighborhood and reviewing their list prices and actual selling prices, your agent can help you arrive at a fact-based assessment of your home’s market price.
Prepping your house for sale
You want to make a positive first impression when you list your home for sale. Here are some tips on how to enhance your home’s best features:
Work on your curb appeal
Some great things to improve your home’s curbe appeal are to get rid of moss on your roof, power wash your front walk, porch, deck and patio. Clean up the garden and mow the lawn, trim the hedges, weed the flowerbeds and add spots of color with container plants. Clean all the windows inside and out and repair them if they don’t open and close easily.
Refresh, repair and repaint
This goes for interiors and exteriors. If you see peeling paint, add a fresh coat. If it isn’t already, consider painting rooms a neutral shade of white or grey. It’s also a good idea to make necessary repairs as you don’t want to turn off a buyer with a dripping faucet, a broken doorbell, a clogged downspout or a cracked windowpane.
Deep-clean, from floor to ceiling
Clean rugs, drapes and blinds, and steam-clean carpeting. Get rid of any stains or odors. Make sure kitchen appliances, cupboards and counters are spotless and that bathrooms shine.
Declutter and depersonalize
Clean, light-filled, expansive rooms sell houses. So be sure to downsize clutter everywhere in your home, including cupboards, closets and counters. You might also consider storing some furniture or personal items to make rooms look more spacious. Take advantage of views and natural light by keeping drapes and blinds open.
Show your house
After you’ve taken care of all the repairs and cleaning tasks outlined above, your home is ready for its close-up: an open house. It’s actually best for you and your family to leave when potential buyers are present so they can ask your agent questions. But before you go, you might want to:
· Take your pets with you
· Open the shades and turn on the lights
· Light a fire in the gas fireplace
· Bake cookies or use candles and plug-in’s
· Keep money, valuables and prescription drugs out of sight
Be flexible in negotiating
If you get offers below your asking price, there are a number of strategies you can try in your counteroffer. You could ask for full price and throw in major appliances that were not originally included in the asking price, offer to pay some of the buyer’s fees, or pay for the inspection. You could also counter with a lower price and not include the appliances. If you receive multiple offers, you can simply make a full-price counter.
Your agent can suggest other strategies as well and help you negotiate the final price.
If your house doesn’t sell or you’ve received only lowball offers, ask your agent to find out what these prospective buyers are saying about your house. It might reveal something you can consider changing to make your house more appealing in the future or switch up the marketing strategy a bit to better manage expectations.
Breeze through your inspection
When a buyer makes an offer on your home, it’s usually contingent on a professional inspection. A standard inspection includes heating and cooling, interior plumbing and electrical systems; the roof, attic and visible insulation; walls, ceilings, floors, windows and doors; and the foundation, basement and visible structure. The inspector will be looking for cracks in cement walls, water stains and wood rot.
You can always opt for having an inspection done prior to putting your house on the market, so you can address any potential problems in advance. Your agent can give you several recommendations for qualified inspectors in your area.
Close with confidence
Whether this is your first time or your tenth, your agent can help guide you though the complex process of selling a home. Moreover, he or she can answer any questions you may have about legal documents, settlement costs and the status of your sale.
Your agent’s expertise, resources and extensive network also work for you when you’re buying your next house. Even if you’re moving out of the area, your agent can refer you to a professional agent in your new community.
Empty Nesters: Remodel or Sell?

Posted in Buying, Selling, and Living by Sonja Riveland
![]()
Your kids have moved out and now you’re living in a big house with way more space than you need. You have two choices – remodel your existing home or move. Here are some things to consider about each option.
Choice No. 1: Remodel your existing home to better fit your current needs.
- Remodeling gives you lots of options, but some choices can reduce the value of your home. You can combine two bedrooms into a master suite or change another bedroom into a spa area. But reducing the number of bedrooms can dramatically decrease the value of your house when you go to sell, making it much less desirable to a typical buyer with a family.
- The ROI on remodeling is generally poor. You should remodel because it’s something that makes your home more appealing for you, not because you want to increase the value of your home. According to a recent study, on average you’ll recoup just 64 percent of a remodeling project’s investment when you go to sell.
- Remodeling is stressful. Living in a construction zone is no fun, and an extensive remodel may mean that you have to move out of your home for a while. Staying on budget is also challenging. Remodels often end up taking much more time and much more money than homeowners expect.
Choice No. 2: Sell your existing home and buy your empty nest dream home.
- You can downsize to a single-level residence and upsize your lifestyle. Many people planning for their later years prefer a home that is all on one level and has less square footage. But downsizing doesn’t mean scrimping. You may be able to funnel the proceeds of the sale of your existing home into a great view or high-end amenities.
- A “lock-and-leave” home offers more freedom. As your time becomes more flexible, you may want to travel more. Or maybe you’d like to spend winters in a sunnier climate. You may want to trade your existing home for the security and low maintenance of condominium living.
- There has never been a better time to sell. Our area is one of the top in the country for sellers to get the greatest return on investment. Real estate is cyclical, so the current boom is bound to moderate at some point. If you’re thinking about selling, take advantage of this strong seller’s market and do it now.
Bottom Line
If your current home no longer works for you, consider looking at homes that would meet your lifestyle needs before taking on the cost and hassle of remodeling. Get in touch with a Windermere Real Estate broker to discuss the best option for you.
Why So Many Americans Are Either Upsizing or Downsizing

Posted in Buying, Selling, and Living by Shelley Rossi

According to two recent surveys that took industry watchers by surprise, many family homeowners are putting frugality aside and upsizing to new houses that average as large as 2,480 square feet (an increase of as much as 13 percent from the year before), and sometimes exceed 3,500 square feet in size.
Meanwhile, millions of baby boomer homeowners are rushing to downsize—with some 40 percent of Americans between the ages of 50 and 64 saying they’re planning to make a move within the next five years.
It’s a tale of two very different segments of the population making dramatic shifts in their living accommodations to find the housing solutions that best suit their needs: one upsizing while the other downsizes.
With so many baby boomers now nearing retirement age (8,000 Americans turn 65 every day), it should come as no surprise that the number of prospective “downsizers” exceed the number of “upsizers” by three to one. With their children gone, these aging homeowners are interested in reducing the amount of house they need to care for, and are eager to bulk up their retirement savings with any home-sale profits.
As for why many families are choosing to upsize so substantially after years of downsizing or staying put, experts point to the extremely low interest rates and discounted home prices available today, and theorize that many families now feel confident enough about the economy to move out of homes they outgrew years ago.
If you’re considering upsizing or downsizing, here are some facts to consider:
How such a move can impact your life
The most common benefits of downsizing:
- Lower mortgage payments
- Lower tax bills
- Lower utility bills
- Less maintenance (and lower maintenance expenses)
- More time/money for travel, hobbies, etc.
- More money to put toward retirement, debts, etc. (the profits from selling your current home)
The most common benefits of upsizing
- More living space
- More storage space
- More yard/garden space
- More room for entertaining/hosting friends and family
Negative impacts:
- Upsizing will likely increase your living expenses, so it’s important to factor into any financial forecasts
- Downsizing will require that you make some hard choices about what belongings will need to be stored or sold
Other impacts to consider:
- The loss of good neighbors
- Lifestyle changes (walking, neighborhood shopping, etc.)
- The effect on your work commute
- Public transit options
Buy first, or sell first?
Homeowners considering this transition almost always have the same initial question: “Should I buy the new home now, or wait and sell my current place first?” The answer is dependent on your personal circumstances. However, experts generally recommend selling first.
Selling your current home before buying a new one could mean you have to move to temporary quarters for some period of time—or rush to buy a new home. That could prove stressful and upsetting. However, if you instead buy first, you could be stuck with two mortgages, plus double property tax and insurance payments, which could quickly add up to lasting financial troubles.
If you need to sell in order to qualify for a loan, there’s no choice: You’ll have to sell first.
Another option:
You could make the purchase of the new house contingent on selling your current home. However, this approach can put you in a weak bargaining position with the seller (if you can even find a seller willing to seriously consider a contingency offer). Plus, you may be forced to accept a low-ball offer for your current house in order to sell it in time to meet the contingency agreement timing.
The truth is, most home sales tend to take longer than the owners imagine, so it’s almost always best to finalize the sale, and do whatever is necessary to reap the biggest profit, before embarking on the purchase of your new home.
When to make the transition
Ideally, when you’re selling your home, you want to wait until the demand from potential buyers is high (to maximize your selling price). But in this case, because you’re also buying, you’ll also want to take advantage of any discounted interest rates and reduced home prices (both of which will fade away as the demand for homes grows).
How will you know when the timing is right to both sell and buy? Ask an industry expert: your real estate agent. As someone who has their finger on the pulse of the housing market every day, they can help you evaluate the current market and try to predict what changes could be coming in the near future.
Even if you’ve been through it before, the act of upsizing or downsizing can be complex. For tips, as well as answers to any questions, contact a Windermere agent any time.
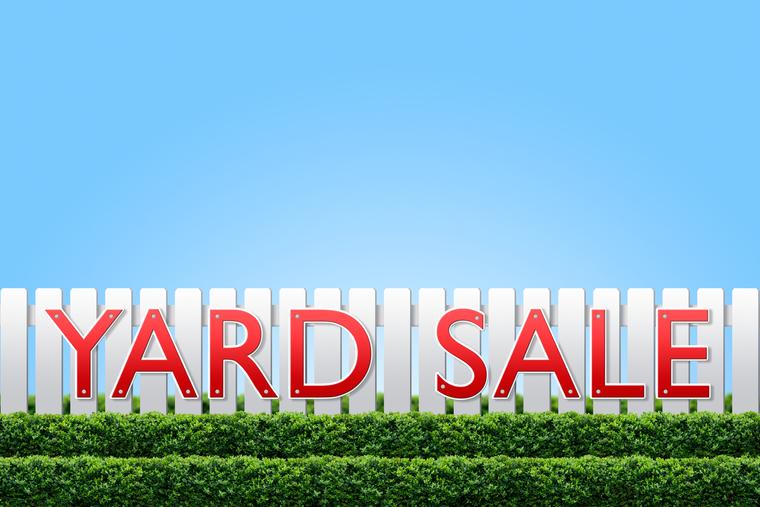
Time to De-Clutter? Some Tips for Selling Your Stuff
Posted in Selling by Tara Sharp

If you are looking around your home and thinking to yourself that it’s time to de-clutter, the winter months provide an ideal time to prepare for a garage sale. But if that sounds like too big of an undertaking, there are other options available to you thanks to popular resale sites like eBay and Craigslist. And if even that sounds like too much effort, you might also consider donating lightly used items to charity or sending them off to the dump. Here are some questions to help you decide which method is best for you.
How much stuff do you have? Are you liquidating your space of large furniture items, a large quantity or quality items, or do you have a small pile of electronics?
If you have yards worth of stuff to get rid of, you definitely want to consider a garage sale. Getting rid of multiple items on Craig’s list can be time consuming, and shipping items sold on eBay can be expensive and eat into your profits. On the other hand, if your items are easily shippable or you have a small enough quantity to take quality photos and post online, then you can save time by using eBay or Craig’s list – and potentially make more money too.
What type of stuff am I getting rid of? Is it worth anything?
If you have large furniture or unique/valuable pieces it may be worth the time to take some quality photos and try to sell these items on Craigslist first. Generally Craigslist works as “first come, first serve” so be prepared to respond to inquiries quickly. If you have small items that have some value, you may want to consider eBay. You reach a much larger audience through eBay which can result in a greater financial return.
How much time do I have?
Garage/yard sales are by far the most time intensive of your options. If you choose to hold a garage sale, you will likely need to dedicate at least three days for prep, clean-up, and the sale itself. All items should be cleaned up, priced, and neatly displayed for sale. Signage should be prominently placed around your neighborhood. You can also place an ad in your local classifieds or on Craigslist to attract a larger crowd.
Will your home/community accommodate a Garage Sale?
Garage and yard sales are generally held at a single-family residence. If you live in an apartment or condo, you may want to consider alternatives due to limited public space. You may also want to consider your community traffic. If you live on a quiet street, you may not get enough customers to generate sales.
Can you enhance a sale by joining with neighbors, friends and family?
Some communities hold an annual neighborhood garage sale, encouraging all neighbors to participate on the same day. This increases your ability to market the event and attract a larger audience.
Want more information on hosting a garage sale? Go here.
5 Mid-century Modern Homes That Make the Most of Their Small Design

Posted in Houzz.com and Architecture by Houzz.com
Midcentury modern homes were small out of necessity. Money was in short supply after World War II, so architects and builders had to keep houses compact yet functional to stay within homeowners’ budgets. At the same time, lifestyles were changing. Smart architects took on a new approach and designed homes with an open feel, which differed greatly from the boxy designs of the previous era.
Related: Why You Should Embrace Your Midcentury Modern Kitchen

Midcentury Modern 1: Flavin Architects, original photo on Houzz
I’ve been enamored with midcentury modern homes since my childhood in California, where I was privileged to spend time in the intimate houses designed by Frank Lloyd Wright apprentice Mark Mills. Mills was the on-site architect for Wright’s famous Walker House, or Cabin on the Rocks, in Carmel, California, pictured. It was during this time that Mills learned an important lesson from Wright: Reject a larger house in favor of a modest home with flowing spaces and no excess.
The following ideas show how midcentury modern homes beautifully make the most of their space in ways that can easily be incorporated in homes today.

Midcentury Modern 2: Wheeler Kearns Architects, original photo on Houzz
1. Open floor plan.
Above all else, the open floor plan is the defining characteristic of midcentury modern homes. Closed-off rooms gave way to flowing spaces that strung one room to the next to form fluid kitchen, living and dining areas.
In a small home, the key to making the open floor plan work is to understand which rooms need privacy, and when. Of course, bedrooms and bathrooms need separation from the main areas of the home, but it’s also good to consider other areas that need privacy: for example, a study where a parent can work without interruption while the kids play nearby.
In this lake house by Wheeler Kearns Architects, the common areas are located in a centralized area, while the more private areas are off to the side or tucked away on another level.

Midcentury Modern 3: Balodemas Architects, original photo on Houzz
2. Expanded sightlines.
The tendency of midcentury modern homes to have open floor plans speaks to the elegant details often seen within these houses. Without trying to be too sparse, midcentury designers included functional details in their homes that were as uncomplicated as they were beautiful. Finding the balance between sophistication and openness was in the hands of the architect.
Take, for example, the stairs in midcentury modern homes. In this remodel of a midcentury home by Balodemas Architects, they preserved much of the original stair and design. The riser, or the vertical part that connects the stair treads, was simply left out for a lighter appearance. The stair was no longer in a hall but fully opened up and integrated into a room. Walls were often dispensed with entirely. Instead, partial-height screens inspired by Japanese shoji were used to subtly separate spaces.

Midcentury Modern 4: Steinbomer, Bramwell & Vrazel Architects, original photo on Houzz
3. An instance to avoid “open.”
While photographs of midcentury modern homes often feature great walls of glass, what’s often not shown, perhaps because they are not as photogenic, are the equally generous opaque walls.
These walls are key to the home’s aesthetic success. They provide a protective backing to the composition, since the opaque side of the home often faces the road, as with this house by Steinbomer, Bramwell & Vrazel Architects. Although the back of the house is open, with lots of glass and a sense of ease between inside and out, the street-facing side would never give that away. An opaque wall creates a boundary to the outside world while extending the perceived size of the home. Walls of glass are expensive, so opaque walls are also an economical design move.

Midcentury Modern 5: Flavin Architects, original photo on Houzz
4. Everything in its place.
Thoughtful storage is a another key aspect of what makes a small midcentury home completely livable. Most midcentury modern homes, particularly those on the West Coast, had no basements or attics, so storage closets needed to be located among the main living spaces. In part, the answer was to do more with less by having well-designed storage throughout and daily items close at hand, as in this kitchen. This has to be married to an ethic of keeping only what you need and having periodic yard sales.

Midcentury Modern 6: Koch Architects, Inc. Joanee Koch, original photo on Houzz
5. Display with a purpose.
In a small home with innovative but limited storage, it’s important to have display areas for the pieces that don’t need to be tucked away in drawers or closets. This was done beautifully in midcentury modern homes by integrating display areas as a means of aiding with the potential conundrum of scarce storage.
This restoration by Koch Architects shows this exact notion at work. Every other step in the stair has an integrated bookshelf. This would make a perfect rotating library with a range of titles easily seen while ascending the stair.
By Colin Flavin, Houzz
Six Key Factors That Affect the Sales Price of Your Home
Posted in Selling by Tara Sharp

Pricing a home for sale is not nearly as simple as most people think. You can’t base the price on what the house down the street sold for. You can’t depend on tax assessments. Even automatic valuation methods (AVMs), while useful for a rough estimate of value, are unreliable for purposes of pricing a home for sale.
AVMs, like those used by Zillow and Eppraisal, have been used for many years by banks for appraisal purposes. They are derived from algorithms based on past sales. But producers of AVMs agree that they are not accurate indicators of home value. For example, Zillow.com states, “Our data sources may be incomplete or incorrect; also, we have not physically inspected a specific home. Remember, the Zestimate is a starting point and does not consider all the market intricacies that can determine the actual price a house will sell for. It is not an appraisal.”
So what does Zillow recommend sellers do instead? The same thing the real estate industry has been advising for decades: Ask a real estate agent who knows your neighborhood to provide you with a comparative market analysis. To accomplish that, I typically consider the following factors—plus others, depending on the house:
Location
The location of your home will have the biggest impact on how much it can sell for. Identical homes located just blocks apart can fetch significantly different prices based on location-specific conditions unique to each, including: traffic, freeway-access, noise, crime, sun exposure, views, parking, neighboring homes, vacant lots, foreclosures, the number of surrounding rentals, access to quality schools, parks, shops, restaurants and more.
Recommendation: Be willing to price your house for less if it’s located in a less desirable area or near a neighborhood nuisance.
Market
Another major factor that also can’t be controlled is your local housing market (which could be quite different from the national, state or city housing markets). If there are few other homes on the market in your local area (a situation known as a “sellers market”), you may be able to set a higher price. However, if there’s a surplus of homes like yours for sale (a “buyer’s market”), your pricing will also reflect that.
Recommendation: If it’s a buyer’s market and you can delay selling your home until things change, you should consider doing so. If you can’t wait, be willing to price your home extremely competitively, especially if you are in a hurry to sell.
Condition
The majority of buyers are not looking to purchase fixer-uppers, which is why any deferred maintenance and repair issues can also significantly impact the selling price of your home. When your home’s condition is different than the average condition of homes in your location, AVMs tend to produce the widest range of error.
Recommendation: Hire a professional home inspector to provide you with a full, written report of everything that needs upgrading, maintenance or repair, then work with your real estate agent to prioritize the list and decide what items are worth completing before the property is listed for sale, and what should be addressed through a lower list price. Also, some defects are best addressed during negotiations with buyers.
Widespread appeal
If you want to sell your home quickly and for the most money, you have to make it as appealing as possible to the largest pool of prospective buyers. The more universally attractive it is, the greater the interest and the faster competing offers will come.
Recommendation:
Hire a professional home stager (not a decorator) to temporarily stage the interior of your home. Also spend time making the exterior look its best: address any peeling paint, make sure the front door/ door hardware is attractive, prune bushes and trees, remove old play equipment and outdoor structures, etc.
Compare homes
The only neighboring homes that should be used to estimate the value of your home are those that have been carefully selected by a real estate professional with special training, access to all sales records, and in-depth knowledge of the neighborhood.
Recommendation: If you’re considering selling your home, ask your real estate agent to recommend a professional appraiser.
Searchability
When working with a prospective buyer, most real estate agents will search the available inventory only for the homes priced at (or less than) their client’s maximum, which is typically a round number. If you home is priced slightly above or below that amount (e.g., $510,000 or $495,000), it will appear in fewer buyer searches.
Recommendation: Be willing to adjust your selling price to maximize visibility.
Periodic price adjustments
Pricing a home isn’t a set-it-and-forget-it proposal. As with any strategy, you need to be prepared to adapt to fast-changing market conditions, new competition, a lack of offers and other outside factors.
Recommendation: After listing your house, be ready to adjust your asking price, if necessary.
Affordable Tips To Up Your Home’s Curb Appeal
Posted in Living and Windermere by Kenady Swan

You’ll never have a second chance at a first impression, so let’s make it count! When it comes to upping your home’s curb appeal, there are plenty of small changes you can make that have a big impact. And best of all, you don’t need to call in the pros or spend a fortune to get beautiful results. Below are some helpful and affordable tips.

A Well-Maintained Yard
Mowing: The first step to a well-manicured lawn is to mow it regularly. The experts recommending mowing high because mowing it too short can damage the grass and allow weeds to set root.
Weeds: To prevent weeds like crabgrass use a pre-emergent herbicide in early spring. These herbicides manage the weeds by stopping the seeds from sprouting in your lawn. Broadleaf weeds like dandelions can be stopped by applying granular weed control products.
Feeding: Lawns consume mostly nitrogen, so look for mixes of fast and slow release fertilizers; they will feed your lawn over time while keeping it lush and green.
Watering: Nighttime watering can result in long spans of moisture on the blades, potentially exposing your grass to disease. Consider watering your lawn in the morning – the sun helps dry out the blades throughout the day.
Flowers: You can quickly and affordably dress up your yard with colorful pre-made flower pots and containers. When placing your flower pots and containers remember that asymmetrical arrangements and staggering plants will provided the liveliest setting.

Dress up the Front Door and Porch
Paint: A fresh coat of paint in a pop color can give your home a well-deserved facelift. If you are hesitant to add a bright color to your front door, check out our article Energize Your Home This Winter With Bright Hues.
Replace Old Hardware: Clean off any dirty spots around the door knob, and use a metal polish on the fixtures. Change out house numbers for an updated feel, put up a wall-mounted mailbox, or add an overhead light fixture. Keep in mind that well thought through elements, instead of mix-and-match pieces, will add the most curb appeal.
Create Perfect Symmetry: Symmetry is one of the simplest design techniques to master and is the most pleasing to the eye. Maintain symmetry by flanking your front door with two sidelights (just make sure that your hardware matches); find two urn planters or a unique visual detail to put on either side of your door.
